Planning for our new battery system

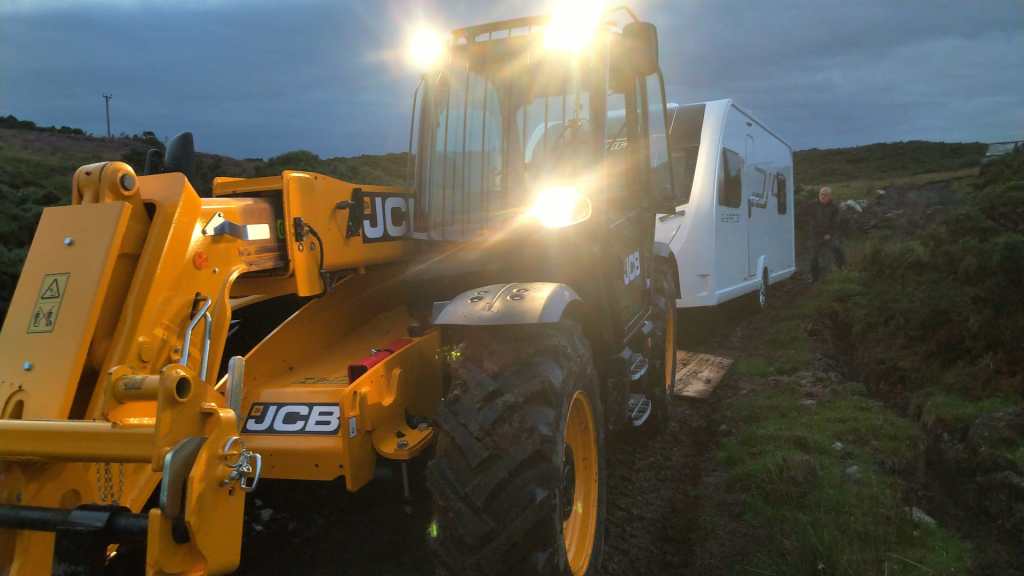
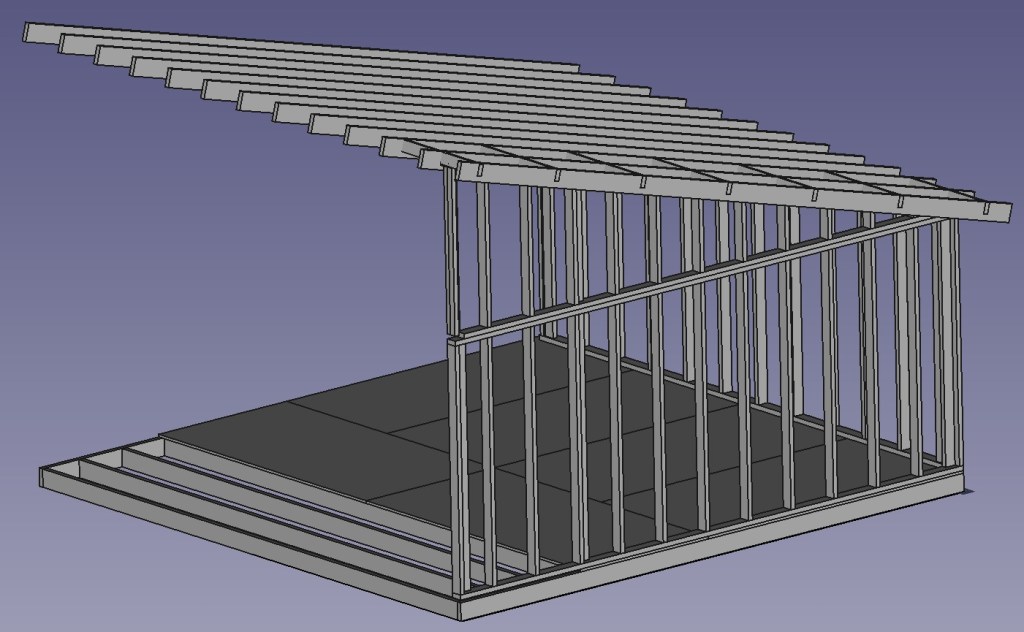
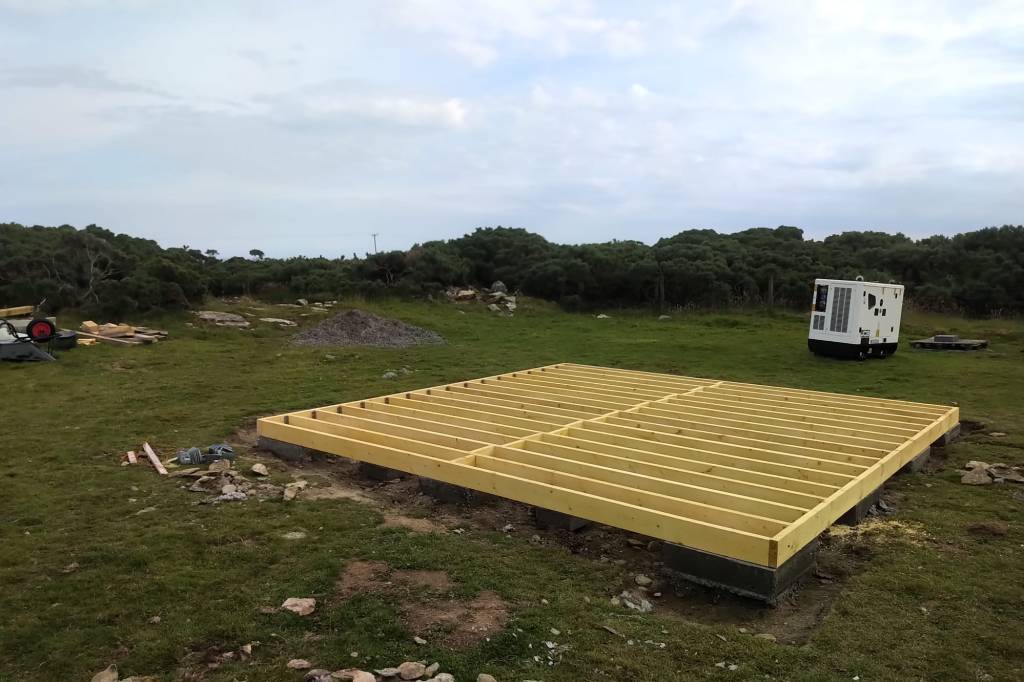
The foundation works for our barn are progressing, so hopefully the barn will be finished by the end of the year and we can start setting up a workshop – and our main electricity installation.

Last year, when I did a rough planning of our electricity needs and installation I decided to go for a battery system from Pylontech or BYD. But now, it is very hard to find a reseller or dealer that can actually deliver these batteries in the UK.

So our current plan is to “build” the batteries ourselves. And thanks to Stuart Pittaway (support him on Patreon, he created the DIYBMS) I found Fogstar, a company that imports and sells Eve battery cells. And this is where I ordered my 112 Eve 3.2V 280Ah 0.5C cells – to be delivered in late November (hopefully).

In the following sections I will explain why I ordered these cells and how I will connect them. So let’s start …

The generator

Our system will be completely off from the main electricity grid. We only have a JCB G20QS as a backup generator that can produce a constant power of 20kVA or 14.4kW. Running this generator at around 75% capacity is the most energy efficient way and will consume roughly 3.29 l per hour. This means I will have an output of 10.86kW and get a 3.3kW per litre of diesel.

Consumption calculation for JCB G20QS

The load

Despite my previous thoughts I will run the whole system on a single phase. This is due to the nature of “electric showers” in the UK all being single phase and using power between 8kW and 10.5kW. As I will use eneergy from the batteries for heating as well, I plan for a daily power consumption of 16kWh per day with a peak consumption of 12kW.

The batteries

I want to be able to run at least 3 days completely on batteries, resulting in a storage capacity of 48kWh to 64kWh.

Currently available LiFePO4 cells range between 280Ah and 320Ah and have normally a C rating of 0.5C. So if use 4 parallel batteries with 16 280Ah cells each I will end up with a capacity of 4* 16 * 3.2V * 280Ah = 4 * 14’336 VAh = 57’344 VAh.

The maximum current draw would be 4* 140A = 560A with a resulting available power between 28’672VAh and 22’400VAh (when the cells run at 2.5V just before shutting off). As it is hard to find DC breakers for that current rating, I actually restrict the maximum draw to 125A per battery giving me a draw of maximum 500A and a resulting available power range between 25’600VAh and 20’000VAh. This will give me at least 16’000Wh.

Side note: I was not sure, if I should really go for LiFePO4 batteries, as I do have the space and storing weight is not a problem either. But in the end I opted against lead acid batteries as the LiFePO4 has become so much cheaper. Temperature is not a problem for me in Scotland as it does not really get cold and the batteries are not outside below 5°C.

Each 16s battery will be controlled by a JK BMS with a 2A active balancer that is connected via RS485 to a Victron Cerbo GX (see below “The connections”).

And the main reason why I went for the 280Ah cells (instead of bigger ones) is, that

  • ( a ) I do not need the bigger capacity of 4 batteries with larger Ah, and
  • ( b ) I see the remaining power of the system, when one battery is offline, as too little with a 3 battery system (instead of a 4 battery system), and
  • ( c ) I would need bigger circuit breakers (with the 304Ah cells), and
  • ( d ) I can still draw 15’000VA with only 3 batteries on the 280Ah setup.
Comparison between 280Ah, 304Ah and 320Ah cells

So the whole system is wired as a 4p16s system (instead of a 16s4p). Or was it the other way round? I always mix it up …

The inverters

I will use 3 parallel connected Victron MultiPlus II 48/5000/70-50 inverters that can deliver a constant power of 15’000VA or 12’000W (and peak up to a total of 27’000W).

One good thing about the model 5000 inverters is that they are relatively energy efficient (rated at 96%) and use only 18W per inverter. So during normal operation I might be running only 2 inverters at a time (with 36W), but I can easily add the 3rd inverter (with a total 48W). And given the output the batteries I could also add a 4th inverter later, if I really needed more peak power without having to add another 16s battery.

The connections

For this system I will use the Victron Lynx DC distribution system that is rated for 1’000A. The main fuse in the Lynx Shunt VE.Can (which is also rated for 1’000A) will run with a 500A fuse. The shunt itself is necessary as the Victron Cerbo GX controller cannot handle more than a single BMS. The shunt will tell the GX via the CAN bus the load level of the 4 batteries and thus hiding the individual batteries from the GX.

The individual BMS will be connected via RS485 and the dbus-serialbattery driver.

The Cerbo will be able to start and stop the generator based on its configured thresholds via one of its relays.

And I could always add a Victron GlobalLink 520 to it to remotely monitor the system.

Charging

Charging will be done via the 3 MultiPlus inverters where each inverter can handle a 70A. This is slightly under the 212A that the generator can produce at 75% load (see above).

This means we would theoretically run the generator for 320min to charge all 4 batteries completely (needing roughly 17l of diesel).

If we only used the generator to charge the batteries for the whole year, we would end up with around 540h of running the generator, costing us 2’040GBP (at a current price of 1.15GBP per litre).

Side note: Though the generator is able to run constantly 24/7, the service package covers an 800 h per year. So even with these 540h we are well below this threshold.

Discharging

As already written, I restrict the discharge per battery to 125A, but the realistic discharge current should be between 75A and 98A per battery on full load (so I could actually also use a 100A DC circuit breaker). These number take into consideration the loss of the inverter, reactive power and the minimum cell voltage before shutdown.

With these parameters we could draw 12kW for a period of roughly 3.6h.

The Eve cells claim to have a lifetime of 5’000 cycles. With the estimated power consumption of 16’000W per day, we would end up in 102 full cycles per year and have a theoretical life time of over 49 years. Probably not …

Accessories

As the battery of the generator runs on 12V there will be a 48V/12V charger that will take power from the main batteries and keeps the generator charged.

In addition, I will have a direct 48V connection for additional 48V portable power packs that can be charged from the main battery system.

Scalability

The inverters can be scaled up to 6 parallel systems with a maximum power delivery of 24’000kW. But even better, I could easily change the whole system to a 3-phase system and still scale it up, uilising 3, 6 or nine inverters if needed.

And the batteries could be scaled easily to 8 parallel batteries before hitting the 1’000A rating of the bus bars and the shunt.

The Lynx Power In and the Lynx Distributor can each easily be extended to support more inputs and outputs.

And if we went for a bigger bus bar, we could also replace the Lynx Shunt with a Victron 2000A SmartShunt.

Summary

So this is it. Until the cells have not been delivered I will not know if this works or not.

We will find out …

Side note: I am no Victron Shop at all, but like how their products integrate with each other and are still able to play with hardware from other manufacturers.

Our water tanks arrived

Two weeks ago our water tanks arrived. But due to heavy winds, it was only possible to collect them last weekend.

The tanks are manufactured by Enduramaxx, but I actually ordered the tanks from JDP in Inverness, as it was cheaper to buy from them.

And then there were the transport cost … According to Enduramaxx or JDP, delivery cost to Whaligoe would be have been between 1’800 GBP and 1’900 GBP. Hmm, that is actually more than the price for the tanks!

Though JDP on their web site offered free delivery, there is a fine print on their web site (“Remote Areas”), stating that specific post codes seem to be exempt from it. When I suggested to them to pick up the tanks directly from their branch in Inverness (and thus saving me the delivery cost), they told me that I could certainly do that but the delivery fee would also apply. As it seems their branch in Inverness (post code starting with IV1, in the center of the city) is also considered a “Remote” or “Restricted” area.

But then funnily, Farm & Forestry in Ardersier (being 10 miles away from the JDP Inverness branch) was not considered a restricted area and could get delivered without paying a fantasy price.

A distance of 10 miles makes a difference of 1’300 GBP in delivery cost (source Google Maps)

The next interesting thing was the price of the water tank itself. The price quoted by the JDP main office was cheaper than the price of the Inverness branch – though both would buy the tank from Enduramaxx directly.

Anyway, after some weeks now the both tanks arrived. And I got 2 times the 6’000l version (instead of a 5’600l version that I originally wanted to buy).

And on Saturday, I went to Inverness to load one of the tanks on my trailer. Once again, the trailer proofed its purpose. After unmounting the high side walls we could drop the tank carefully on the trailer bed.

And as soon as we have the roof on the barn, we can start collecting rain water …

Tank loaded and secured with 2 orange and 2 blue ratchet straps
Tank safely arrived in Whaligoe with 3 orange and 2 blue ratchet straps
On the way to the plot
Unloading with the TeleHandler

ps – yes I had to stop on my way home a couple of times as the road surface and the resulting bouncing of the trailer was not helping at all to hold the tank in place …

We finally have a postal address

After trying to register a postal address for months to no end, I was considering the alternative of applying for a PO box life membership.

And then it was all too easy …

The “problem” was a mixture of not having an access road to the plot where we would like to receive postal mail and having no building on the plot with which the address could be connected to. And then you can only start building with a planning permission. But then how would you get deliveries to the construction site without an address?

Note: yes, this is somehow possible, as in using addresses (which we did) such as:
That Gate on the A9 opposite of
The Red Farm
Caithness
AB1 2YZ

However, often shops do a real-time address lookup and would not find “That Gate” …

When contacting Royal Mail directly via one of their “I would like to register a new postal address” forms, we got the reply, that only the Highland Council could actually register new addresses. Hmmm, so why offering this service in the first place, one might ask?

Highland Council then told us that only with a planning permission and a completed house we could actually register a new address. Bummer.

We are building a house in the future, but we want to start with a barn first, for which we do not need a planning permission.

Rescue came in the form of a “Planning Prior Notification” which is a “notification” (hence the name?) to the Highland Council that we want to build a barn for which we do not need a planning permission, as it falls under “permissible development”.

Funnily, this “notification” still has to be approved by the Highland Council. So, is it then really still a notification? One does not know.

Anyway, with this notification approved we could then ask for a new postal address at the Highland Council by actually getting a “Unique Property Reference Number” (UPRN) first.

Once we got that we could proceed and have the address being activated in the Royal Mail database (but not in the Highland Council address database, as the building has not yet been completed).

And then it was only a matter of days, that I could do a search for “Loch Watenan” and get the address returned.

Our letter box installed and awaiting mail. End of story.

Ok, it was not that simple.

Some things that had to be done before this happened:

  1. Provide exact details of the location of the property
  2. Provide the planning reference number
  3. Choose house name (much more difficult than one would think)
  4. Provide the OS grid reference number for the property
  5. Find the What 3 Words address for the property
  6. Convince Highland Council that we still want a postal address and have a secure drop-off point, though our building has no access road
  7. Ask for exception to be included in the Royal Mail address database though the building has not yet been completed
  8. Confirm that delivery to that address is really possible
  9. Inform the local Royal Mail delivery guys that there is actually a new address (probably the most important point here)

Side information here: the road to Loch Watenan actually has a name, though most people here do not know. It is “Watenan Road“.

Originally this was an unnamed road (“U1202” road) while some locals claim, the road was called something like “Marble Road”.

Highland Council U1202 Watenan Road

In reality road name or house name, it does not seem to make a difference. The only thing up here that counts, is: the two local mail delivery guys know you exist. So basically one could write any house name with the correct post code on it, as long it has the correct name (your name) on it.

The “Highland Way” I guess …

We got the “Planning”

Today, we got the planning for our barn. Actually, we received the positive decision for a “prior planning notification” (which is certainly not a Planning Permission), as in Scotland there is no need for full planning permissions when building agricultural sheds.

So, this went really well! And now we can do the next step. That is: ordering the actual building kit which will be delivered from Robinsons Agricultural.

The barn will be a metal construction of 30m x 10m with an eaves height of 5m. We will be starting this week with the foundation and the levelling work.

The building site (to the left hand side of the image)

Can’t wait to post updates on this one …

Cat Walk – Hike Training with Our Cat

As part of our training excercise for the upcoming hike our cat and I regularily walk from the house to the part of our plot that some locals call the “Rabbit Run”.

Back and forth this is a good 1’250m, after which the cat sometimes needs to take a break.

Here is the route in OSMaps.

Hike Training with Our Cat

You can also consider this video as my contribution to the never ending world supply of cat videos on the internet. Hopefully, this remains an exception.

Sizing Water Consumption and Storage Tanks

With the nearest water connection more than 500m away and crossing a main road plus multiple neighbours’ grounds, we decided to go for a rainwater collection and filtration solution.

So be prepared for a lot of numbers in this post.

In order to size such a system, I first tried to find out the demand of (drinking) water we would have on our plot.

According to a publication of the german Umweltbundesamt every person in Germany used 123l of drinking water per day.

This breaks down to the following parts as seen in the following picture:

Source: BDEW 2019

I adjusted the numbers slightly to what I would expect in our environment (for example, as we are using a composting toilet we need nearly no water for the toilet, but I left in the 9% for small enterprises). Percentages in green are estimated less than the provided statistics and percentages in red estimated higher than the statistics:

Summary of water consumption

This gives us a distribution like this:

Estimated Water Consumption Distribution (65l)

I then calculated the demand for 2 people of several periods of time:

Demand and Supply

So I came to the conclusion that our 2 people household would roughly need 50’000l of drinking water per year and that with a standard 1000l IBC we could last approximately 7 days (which I the amount of water we can easily carry in one go with the TeleHandler).

I then went on to the SEPA web site to find information about rainfall data in the area where we are. Unfortunately, the nearest data points on their map are either Halkirk near Thurso or Kilphedir near Helmsdale.

Image from: SEPA Rainfall data for Scotland

Among the various statistics they provide they list the actual rainfall in mm/cm2 for the last 12 months:

SEPA web site Rainfall data for Scotland

I projected the numbers from this chart to the size of the roof of our barn (roughly 310m2) that would act as our water collection surface:

Estimated rainfall

So even during the last driest months in the last year (June: 8’520l and March: 6’240l), we expect still be more than enough rain (> 4’000l) to supply us with water.

And now to the sizing: As I do not want to empty the tanks completely (there is always some sediment or dirt at the bottom of the tank), I want to be able to leave approx 20cm water level in the tanks.

I looked at the dimensions of water tanks from different suppliers and found these dimensions for the sizes of 5’600l, 7’200l, 10’000l:

Tank sizes and net capacity

So even with a 5’600l tank I could “survive” for a whole month and still had left 20% for increased demand while always leaving 20cm of the water in the tank. And with a lifting capacity of at least 1’250kg we can still move around such a tank if required.

So my sizing conclusion would be to get two of these 5’600l tanks (so one tank could always go into maintenance or act as a backup) and and have two 1’000l IBC tanks for emergency water transport.

Depending on the water tanks and its certification this would cost approx 2’500,00 GBP (without delivery fees or hoses and the like).

Did I miss or forget something? What do you think?

ps – below you find the podcast version of this blog post:

Swift Sprite Major 4 EB off-road edition

We decided to get ourselves a caravan as a shelter on our plot as long as we do not have anything else to hide in. And yesterday, it arrived.

We decided for a Swift Sprite Major 4 EB, which is a caravan with a separate bedroom, living/cooking area and a toilet and shower in the middle of the caravan.

However with a total length of approx 7.5m and only a single axle, it only has limited ground clearance (with limited meaning really limited).

The route (from OS Maps)

Sneak preview: we made the 450m in roughly 4 hours whiche equates to an astonishing 0.1125 kilometer per hour. In the image above you see the route we took.

Due to heavy rains in the last couple of days, the whole track was pretty soaked, so we had to use the TeleHandler to pull the caravan. However, the 50mm ball -hitch on the Tele was way to high for the caravan (ca 65cm above the ground), so the effective ground clearance of the caravan was even less (actually less than 10 cm).

I really did not find to take many pictures and videos (too occupied with the whole operation). But you might get at least some impressions of the undertaking.

The bginning of the journey
Plenty of ground clearance
Steeper than it looks
After the fence we have to turn left onto the ramp
Not only steep downwards but also steep sidways
Who needs a whinch?
Already getting dark – the final meters
Arrived at destination

Though we used plywood at the bottom the caravan still got some scratches at the rear. But still in one piece.

We will probably wait, before we move it next time …

Updates on the plot

It has been a while since I last wrote about what has been going on the plot. And actually, something has happened.

Still with Toyota, trailer and telehandler

Let me briefly explain where we currently stand and maybe I find time to to dive in to details in additional posts.

Even the cat likes the telehandler

So what happened?

  1. We got our Telehandler, the JCB 531-70; so we are now able to do some heavy lifting and more …
    Quick note: And yet with this delivery not everything went smoothly, as the brand new machine was not working completely as expected. But we now have a new local technician from Latheronwheel who is very kind and helpful.
  2. The digger finally got fixed. We now even have a quick-hitch, which seem to be not so “quick” (but that is a different story). We were even able to fix a loose track on the excavator. It is easy once you know …
  3. We also now have a 3.5t 13ft tipping-trailer with which we are able to bring more stuff to the plot (such as concrete, gravel – more on this later).
  4. We fixed more parts of our track to the plot (by adding stones to the ground and putting gravel on top of it). This is only a temporary fix, as the ground is still way to weak to hold the weight of the 7t Telehandler or a fully loaded trailer.
  5. We even now a diesel tank from which we can fuel our vehicles and machinery. And refilling it on the main road is as easy as lifting it with the forks of the Telehandler.
  6. Electricity is now much easier as we can run on a generator as long as we have not finished the turibine/battery set up. As the generator runs on diesel we can refill it from the same diesel tank as everything else.
  7. We discovered a quarry on our plot (which has not been used for probably more than 100 years. I have 2 raw short video sequences (no voice, just walking aroung) that are linked below to get a first impression. As you can see, we had to cut through a lot of gorse to actually get there. The only reason I found out that there is a quarry was, that I saw it on some older maps from the scottish national library archive. There is still some work to get done to easily access the quarry or to get some stones from it. But the good news is, that we now would not have to transport that much amount of stones from a different quarry further away.
  8. We actually started with our shed; i.e. we did the foundation by pouring concrete for 12 pads and nearly finished the floor insulation. That actually means that the wood *finally* arrived (more than 3 months). Next time I buy the wood somewhere else and not at the Sutherland woodyard in Wick (and yes, I would link a website if they had one).
  9. Planning permission for entrance from the A99 and the barn is still under consideration (*everything* in the Highlands justs takes looonger).
  10. I got myself a pocket calculator Construction Master Pro Trig from “Calculated Industries” to at as a babel fish between the “imperial” surrounding and my “metric” mind. Now I know that 2″ 7/8 are roughly 73mm – so good!
  11. We cut away even more gorse (and still have to wait until autumn to be able to burn it).
  12. I finally admitted to myself that I will have to do a monthly trip to Inverness to be able to buy the stuff I need (the cowboys riding to the city). And here the trailer really comes in handy!
    Side note: and it was actually in Inverness where I got the scaffolding poles for the turbine. No way for me to get them in Wick.
  13. We did some sheep shearing support – first step in becoming real crofters …
Sheep shearing
Shearing sheep

So why am I writing all this? Is everything solved? Far from that.

I am probably more of writing this to remind me that though it seems that nothing really proceeds as planned and barely no progress is visible, some things are still getting done. So there is actually progress (however small it is).

Shedland

Shed plan
Floor frame
Insulation

Quarry videos

Way from quarry to rabbit run 1/2
Way from quarry to rabbit run 2/2