
Recently, when I converted most of my electrical sockets and connectors to Neutrik powerCON True1 TOP, I was looking for a Neutrik power distribution. After some failed tests to build a box myself from an junction box, I found a product called Mini Brick from an italian company called Valentini which was sold via Distribution Zone in the UK for a retail price of 145 GBP (174 GBP incl VAT).
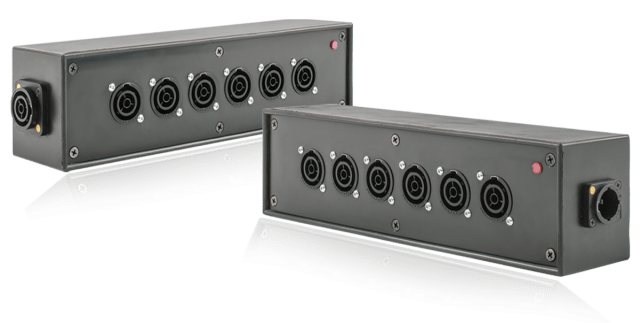
The box is essentially a 6-way (and not 7-way as shown above) power distribution rated up to 3500W (nearly 16A @ 230V) and has a red status light to indicate if it has power.
Build quality is very good (metal or hard plastic case, rubber coated); and the price is also understandable, as the chassis connectors alone would cost around 60 GBP. However, I was not totally happy with it due to is relatively massive form factor: L80mm x W75mm x H300 mm plus connectors.
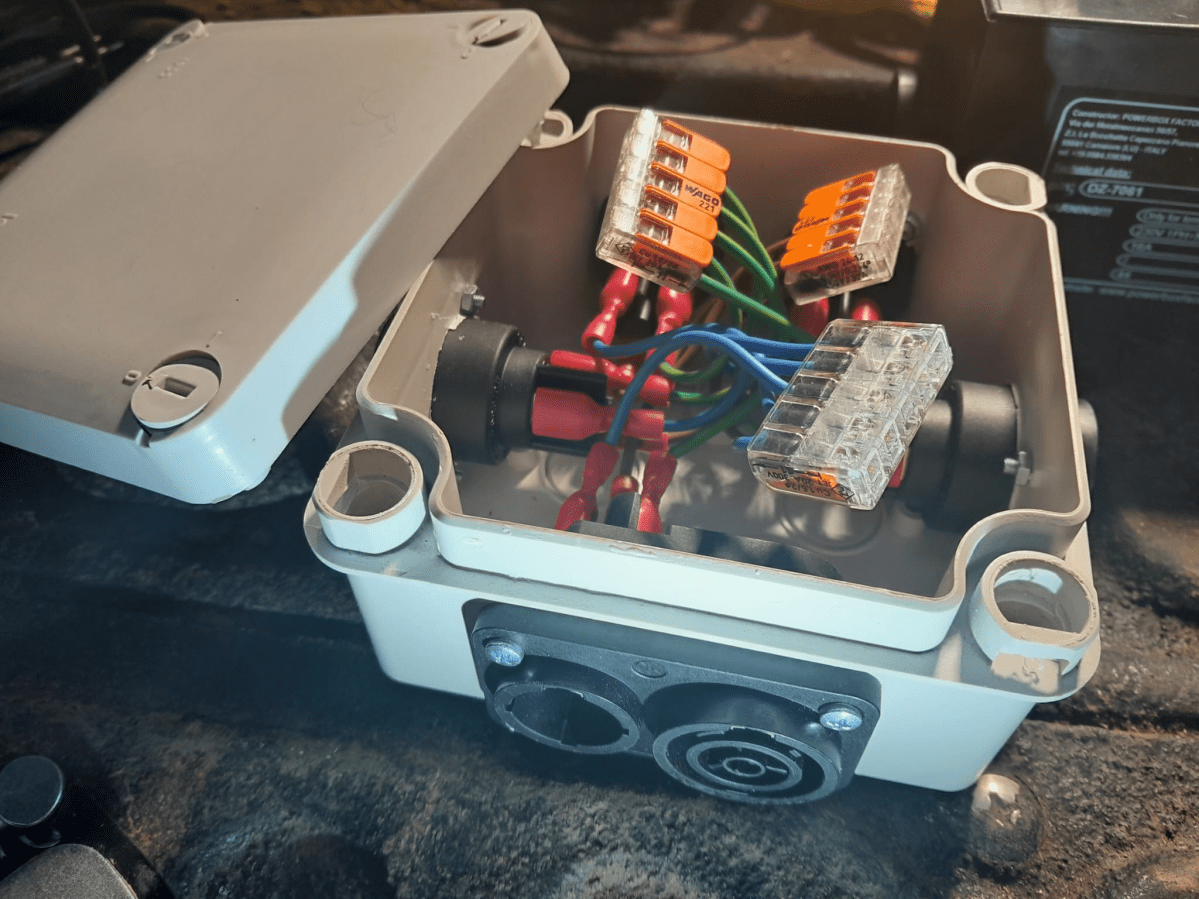
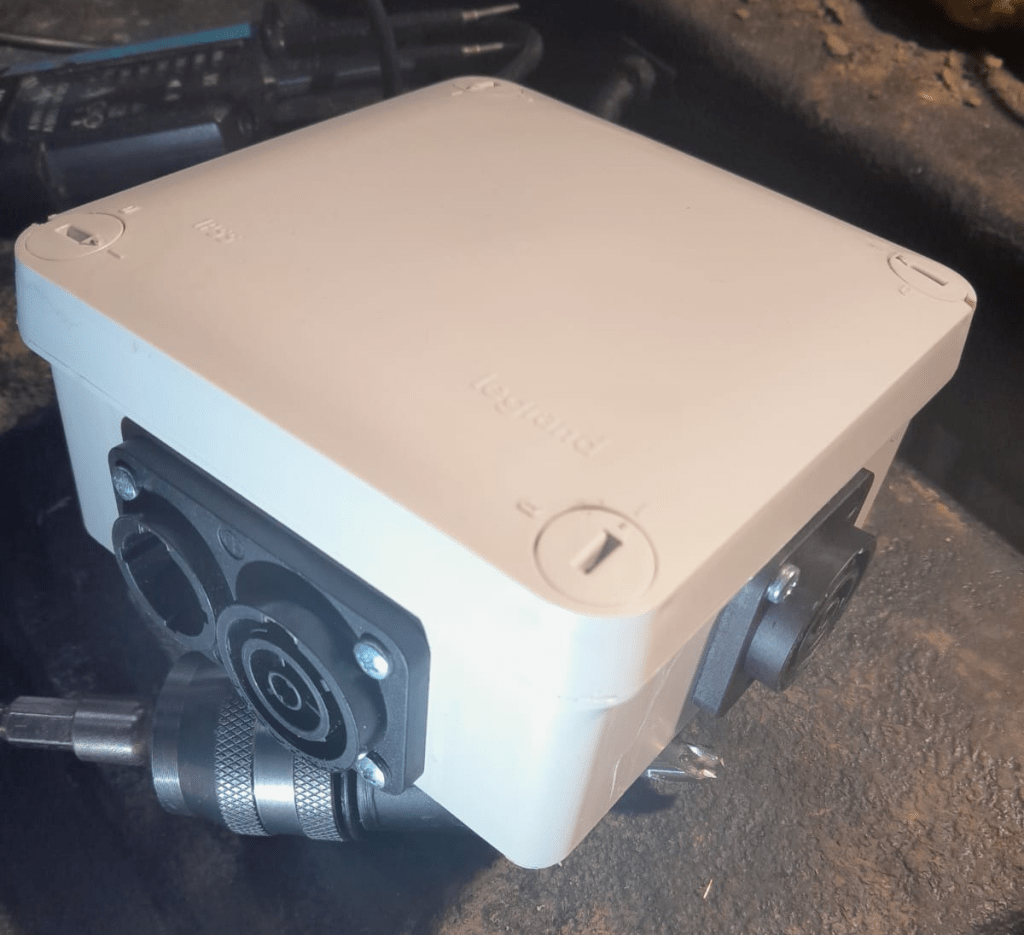
So, I had to go back to the drawing board. And I found a junction box from LeGrand, a french manufacturer, without any membranes or cutouts with these dimensions: 105mm x 105mm x 55mm (and an IP 55 rating). In this box I should be able to install one Neutrik NAC3PX duplex connector and four Neutrik NAC3FPX-TOP (female) connectors.
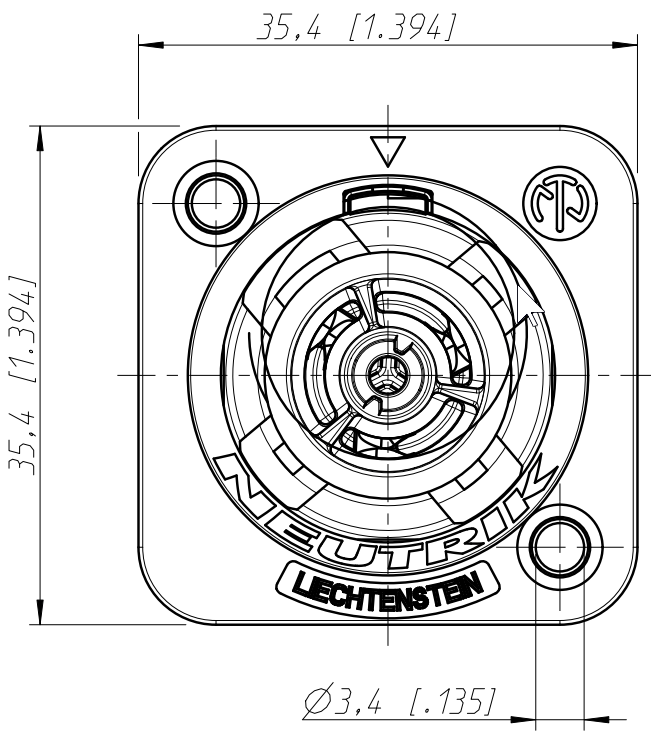
To cut the holes for the chassis connectors into the case, I used a Hilti 30mm hole saw with my Wabeco drill stand. Drilling the duplex chassis connector obviously needed 2 holes and a cutting away some excess plastic (later on I found out that a 25mm diameter is better suited for the smaller part of the duplex connector):

Note: one might be even able to use 29mm and 24mm holes, see the detailed drawing – maybe I try this next time.
To mount the chassis connectors onto the box, I used M3 screws and hex nuts (I could not find TX versions) which I drill with a 3mm Hilti HSS-Cobalt drill (yes, overkill – but the only drill I had at hand). Unfortunately, the screws were a slightly too short, so it was a little bit of fiddling to get the hex nuts onto to the screws.
After all the Neutrik connectors were installed, I wired them to a 5-way Wago 221 COMPACT series splicing connector (221-415) with fully insulated blade receptable connectors (1.5mm2, 0.8mm, 6.35mm) to the socket and with 1.5mm2 ferrules to the clamp.
Here a quick list of tools I used:
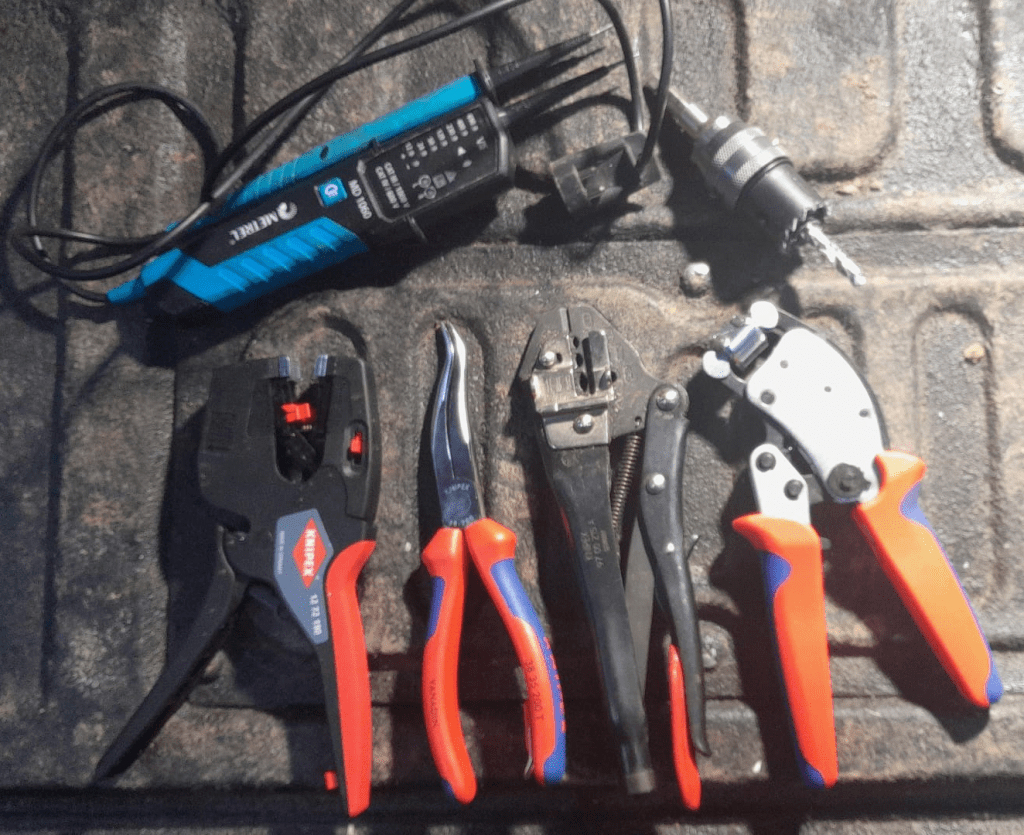
- Knipex Mechanics’ Plier to get the hex nuts on the M3 screws
- Knipex Twistor 16, self-adjusting crimping pliers for crimping ferrules
- Knipex 97 00 215A crimp grip plier for crimping blade connectors (not available any more)
- Knipex NexStrip for cutting and stripping the wire
- Metrel MD 1060, two-pole voltage tester
After assembly I did a final connectivity test to ensure all wires (L, N, PE) were correctly connected. As the duplex connector has a different wiring layout, it is easy to mix things up (PE is in the middle and not at the side).
The end result is not as sturdy as the Mini Brick, but much lighter and smaller. And if I ignore the amount of labour I put into the build, this box is certainly much cheaper.
And as usual: electrical installations can be dangerous – only have them performed by qualified personnel.
