Wago: LEGO for grown-ups

Note: this post continues our adventure of converting a workshop into a flat.

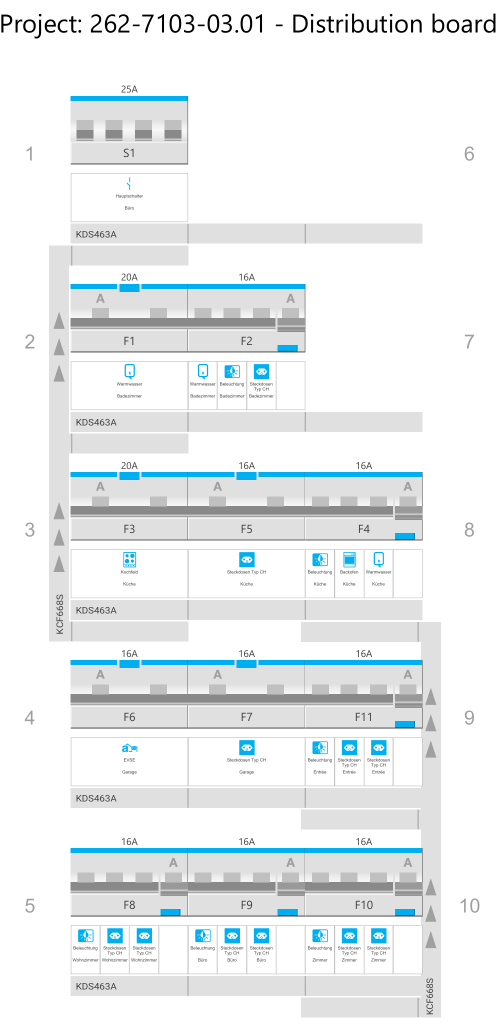
Most of the electrical parts arrived. So it was time to draw the rest of the electricial installation inside the enclosure – and of course to apply some last minute changes …

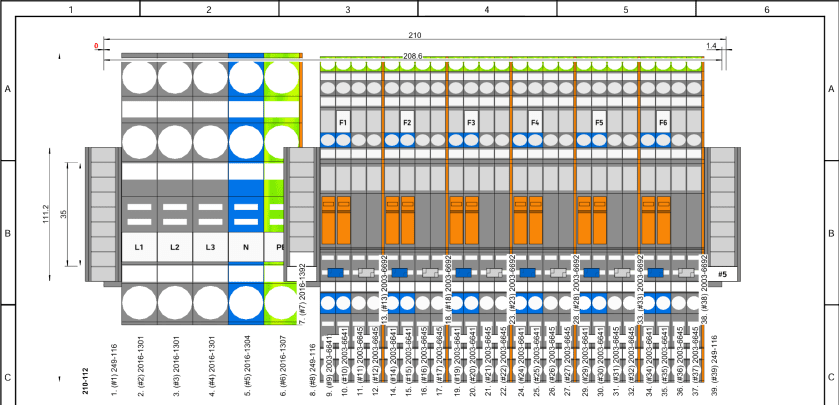
The first thing I had to change was the vertical bus bars due to a bug in the Hager Ready software which turned out to be not so ready. Based on my RCBOs the software suggested to use a Hager FWB72N3 7-row 2-field 150mm field enclosure – in combination with the 125mm quickconnect bus bars. Surprisingly they did not play along that well. So now, I exactly had to do what I did not want to do: excessive cabling from row to row inside the enclosure. What a bummer. Luckily, there are fixed vertical jumpers available from Hager in the required size:

Problem solved – just not with “quickconnect”. On the other hand, even with quickconnect I would have had to screw in the vertical bus bars anyway.

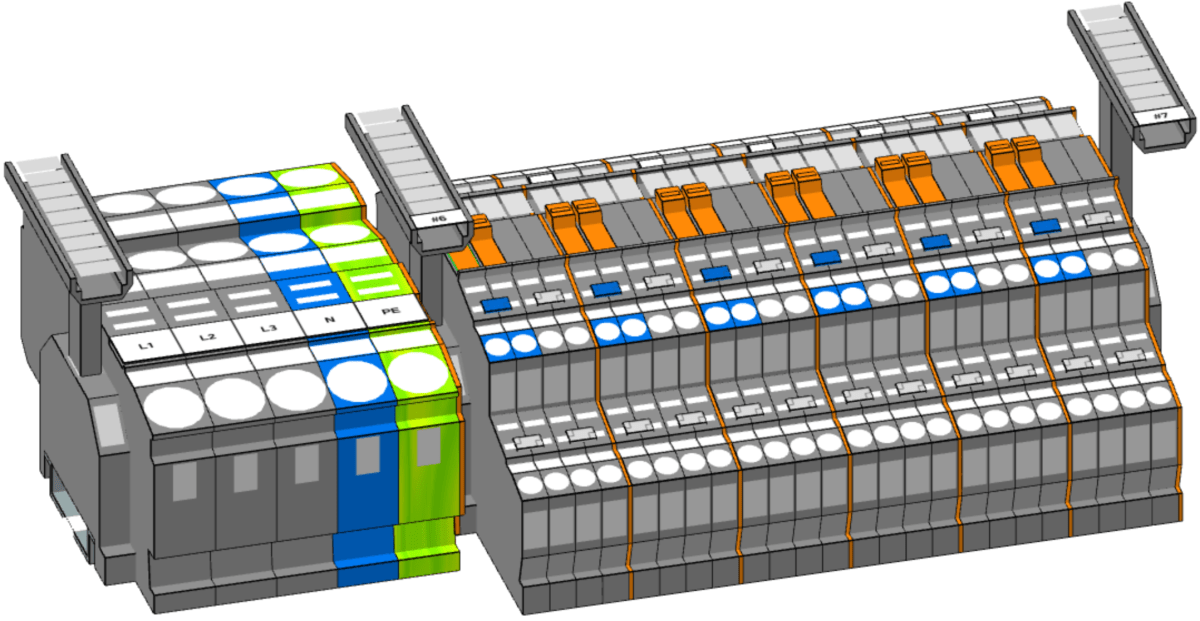
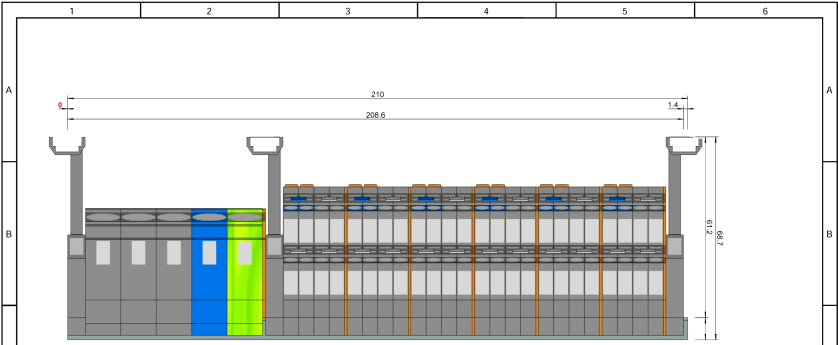
But now back to our terminal blocks. As we have a total of 11 RCBOs I see no point to install a bunch of separate neutral bus bars. Instead I opted for rail-mount terminal blocks from Wago that are also known as Wago TOPJOB S (how this rolls off the tongue). And Wago provides a web-based Smart Designer to help layout the terminal blocks and fight through their jungle of product names.

And this is what I came up with first:

Looks neat?! The software goes even further and produces a comprehensive bill of material which facilitates ordering the right stuff:

Wago bill of material for our terminal blocks including acessories, taken from Wago Smart Designer

But there the next problem was already waiting for me. As I wanted to connect the RCBOs not directly to the cabling that led to the appliances, but via a row of terminal blocks, I found out that despite the FWB72N3 being a Type II enclosure the upper to DIN rails were not insulated from the main chassis. So, I could not use these DIN rails to distribute PE over it – unless I replaced them with 4 UTC22C. Another “bug” in the Hager Ready software? Ok, not really a bug, but definitely a nuisance. The longer the more I began to question the advantage of buying a pre-fitted and pre-installed enclosure and using an app that calls itself “Ready” (with capital R).

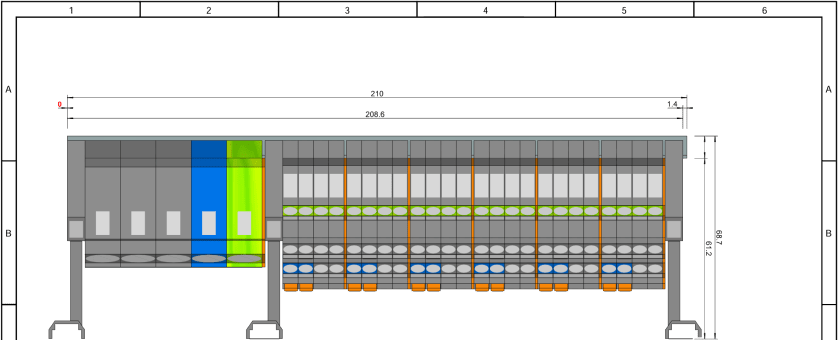
And just when I thought I was finished, I changed my mind and added a neutral-disconnector into every outgoing RCBO connection – to facilitate testing an future maintenance. Now, I just have to lift the orange lever and the neutral is disconected – no plugging and unplugging of cables, no lose ends …

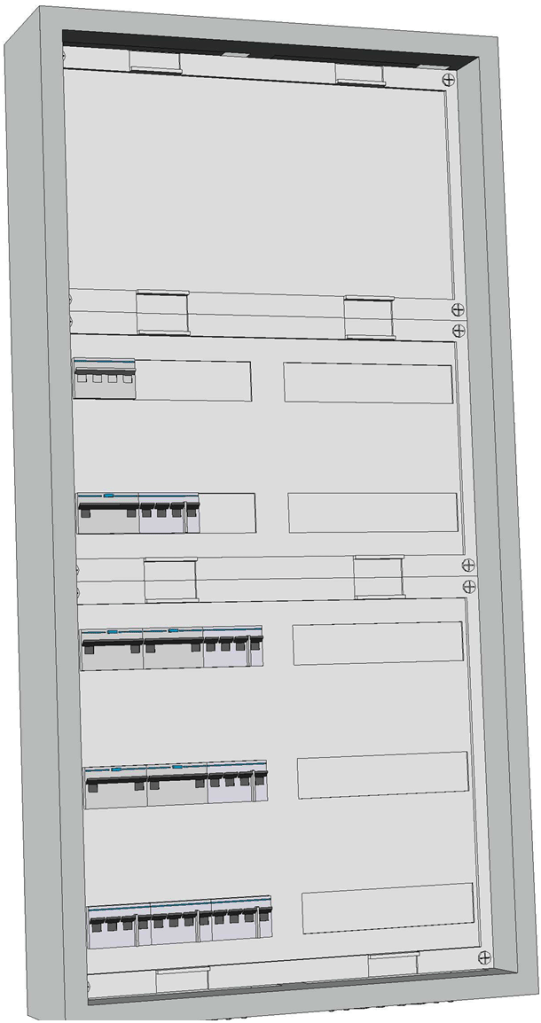
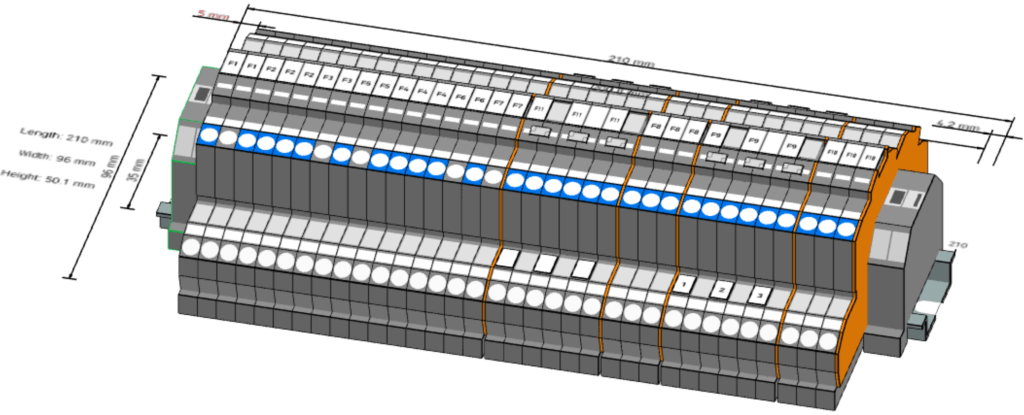
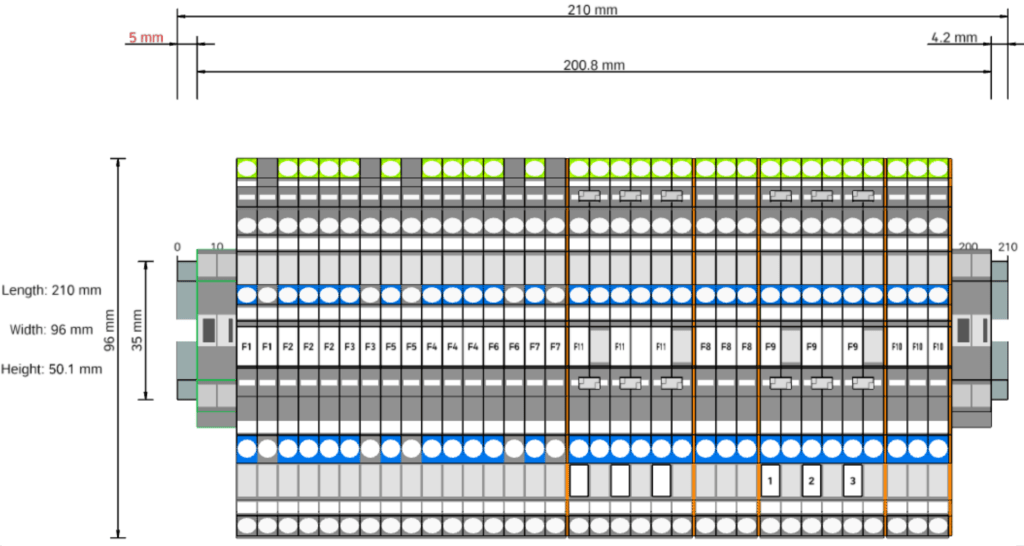
And this is what the final model of our layout looks like (and it just fits onto a 210mm 12 module DIN rail):

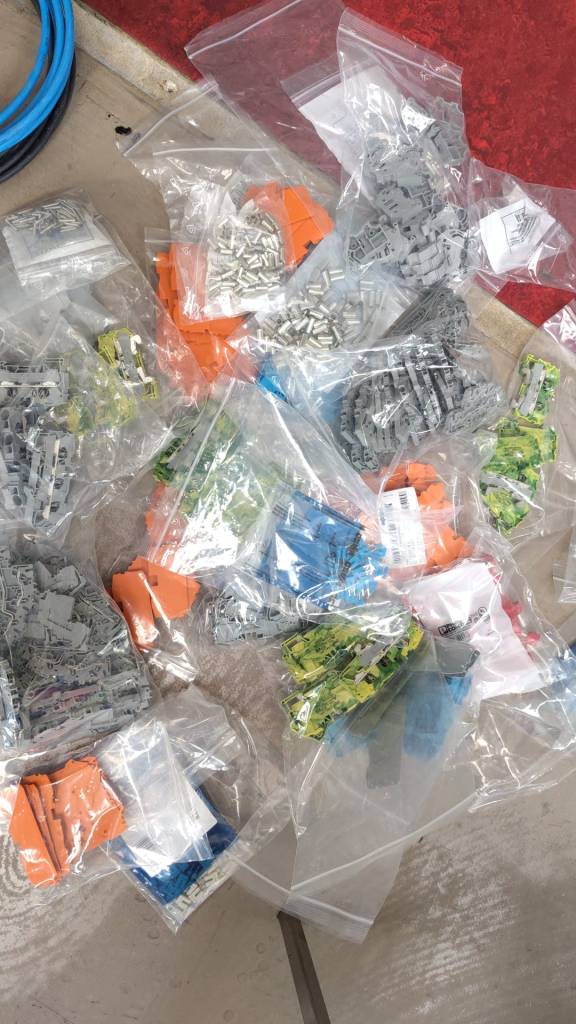
I must say, playing with the Wago configurator is a lot of fun. And unpacking it is also great – reminds me of my long-gone days of LEGO:

Wago – LEGO for grown-ups

With these 2 rows of terminal blocks I can easily change my configuration inside the enclosure or the cabling in the rooms without affecting each other.

The main terminal blocks accept 16mm2 for fine-strained wire and 25mm2 for fixed wire and the rest of the blocks accepts 2.5mm2 (fine-strained) or 4mm2 (fixed). Enough for all of our cabling needs. Each of the smaller terminal blocks accepts up to 20A whereas the larger terminal blocks accept 76A (all at 230V)

The next thing is to design a junction box for the rooms to distribute the cabling to the appliances.

Will keep you posted.

Converting a workshop into a flat

Now, that we just finished our plumbing course, it is time to apply our freshly acquired skills.

A prowd owner of a Certificate of Unit Credit towards Level 2 Diploma in Plumbing Studies

What better opportunity could there be than to convert an old workshop into a modern flat? During the next weeks we will document our plans and progress towards that conversion.

These are the things that need to be done:

  1. Add an interiour wall to separate bath room from kitchen
  2. Add an interiour wall to separate bed room form entrée
  3. Paint walls and ceiling
  4. Lay laminate flooring
  5. Rewire electricity, add energy meter and distribution board
  6. -and of course now to the plumbing- Install pipe work for water in bath room and kitchen
  7. Move soil stack up to first floor
  8. Install shower, toilet, basin and washing machine
  9. Install kitchen sink and dish washer
  10. decommission existing connections
  11. … and clean up and make space first

We first started with a basic room layout which I did in Sketchup Make 2017, the last *free* version of Sketchup by Google (now owned by Trimble). Though Trimble does not support or offer that version, thanks to the Internet Archive Wayback Machine the version can still be downloaded.

Note: the “PRO Trial” will revert to the free version aftert 30 days.

My last Sketchup experience dates back to 2015 when I modelled the packaging for the beer bottles of our then breweey, so the model I came up with now (not completed) is not really stable not particularily beautiful. But you will get an idea.

As the walls of the building are made of ferroconcrete and we are not fans of flush mounting we decided to put all the pipework and cabling on the walls and not hide them in conduits.

For the pipework we decided to use Geberit Mapress 15mm stainless steel pipes. There we go for the slightly cheaper 1.4521 variant (and not 1.4401) which is also approved for drinking water:

Application overview – Geberit Mapress Stainless Steel for liquid media, taken from https://cdn.data.geberit.com/overviews/GB-en/DAS_157952.pdf

For the electrical installation we have to install a distribution board with a separate energy meter. For this, we chose Hager and wanted to try out the quickconnect system, where everything is just plugged into place instead of being screwed down.

With the Hager Ready app (on Windows) it was suprisingly easy to configure and validate the layout (though the “wizard” was not working in my favour and always picked the “wrong” products which is why I added the components manually):

Distribution board with components

It even generated a 3D view of the selected enclosure:

3D view of enclosure

For the connection of the actual wires from the rooms to the 11 RCBOs I chose to go via 2003 WAGO DIN rail terminal blocks (on row 1 of the board). So with quickconnect in place and these terminal blocks, I only have to run 56 2.5mm2 wires (plus one 16mm2 PE) for the whole distribution board!

To make calculation of the required cable lengths a little bit easier I threw the numbers into this spread sheet:

Required cable length for a 2×7 distribution board

For 33 phases and 23 neutrals RCBOs I would need nearly 60m of wire! This is because I really cannot use bus bars for neutral. For a comparison: If I had got a 2×6 distribution board I would have used nearly 10m less for the internal cabling (but unfortunately, there was none available):

Required cable length for a 2×6 distribution board

I ordered most of the electrical stuff today and will have an update on it when the material arrives.

And this is it for today.