Washing Machine and Dishwasher Tower

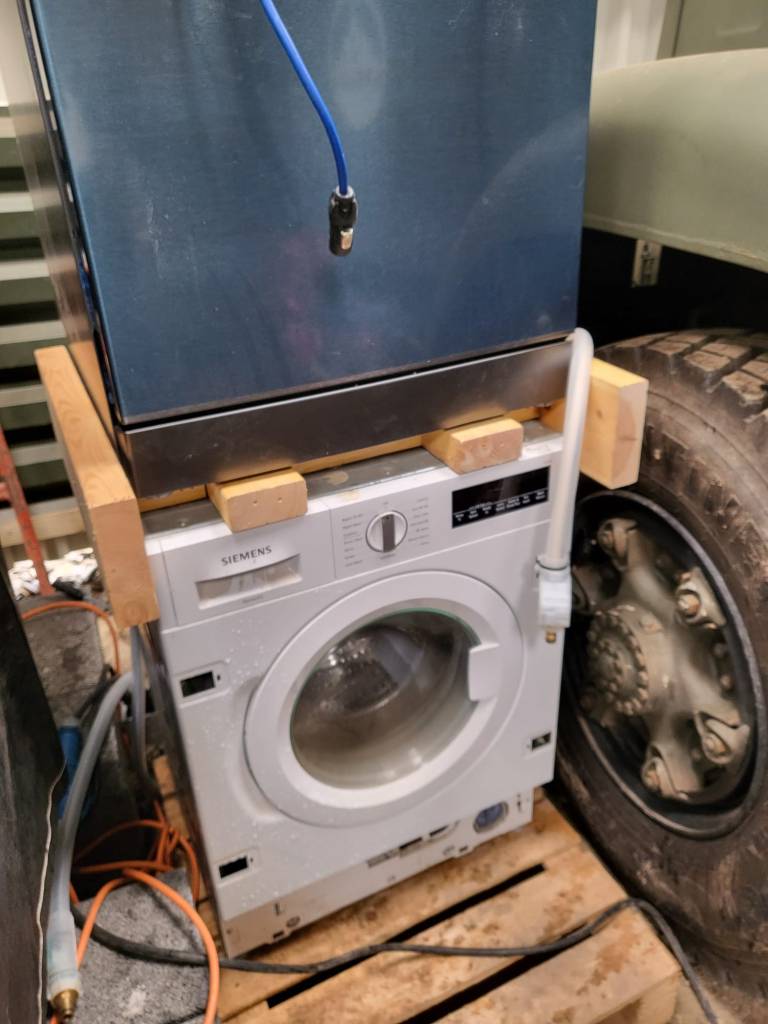
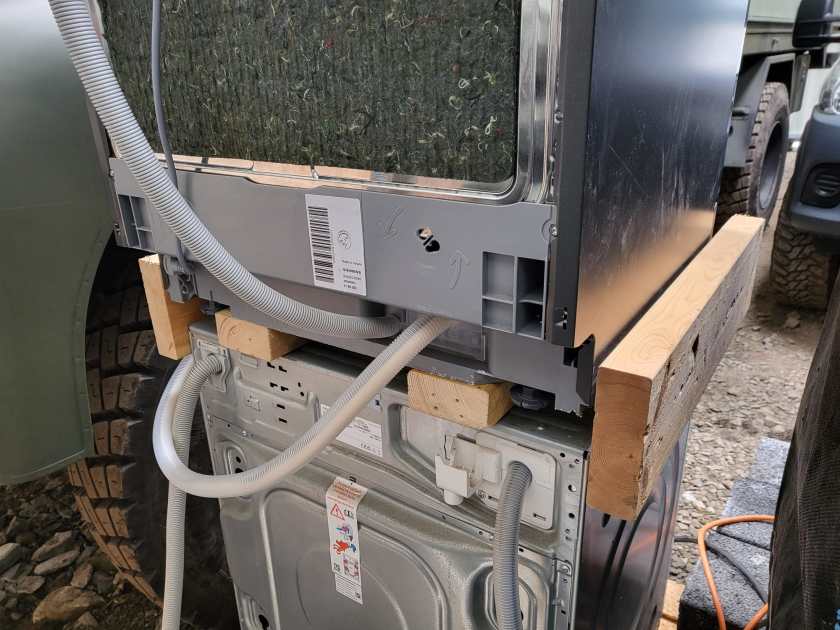
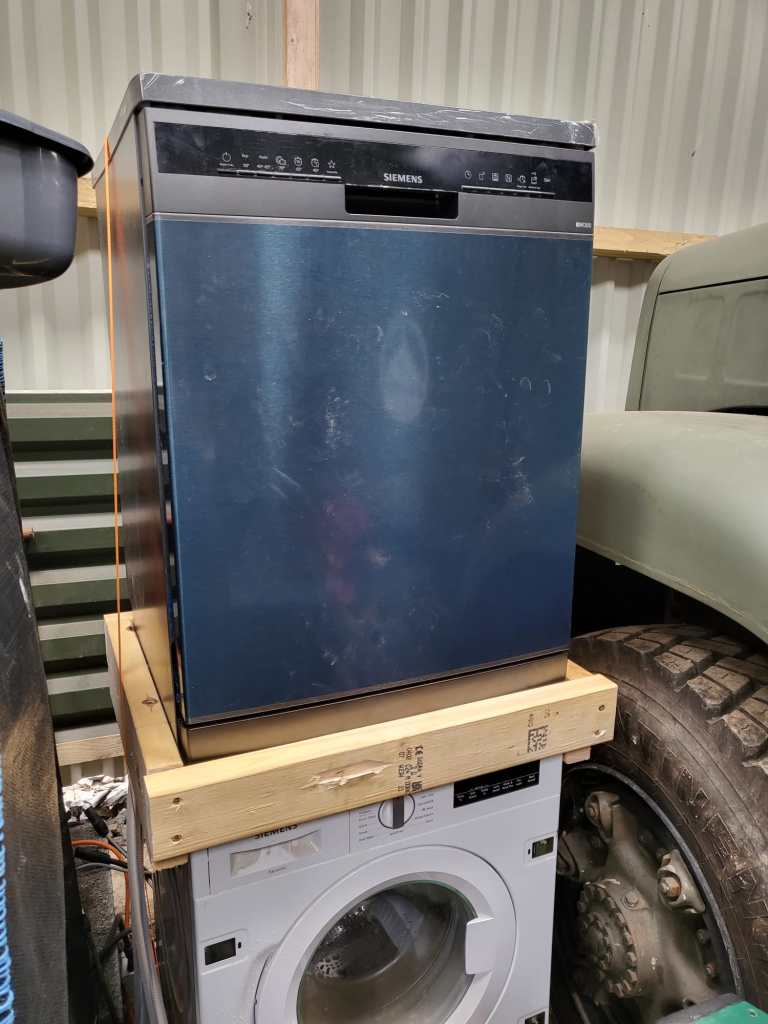
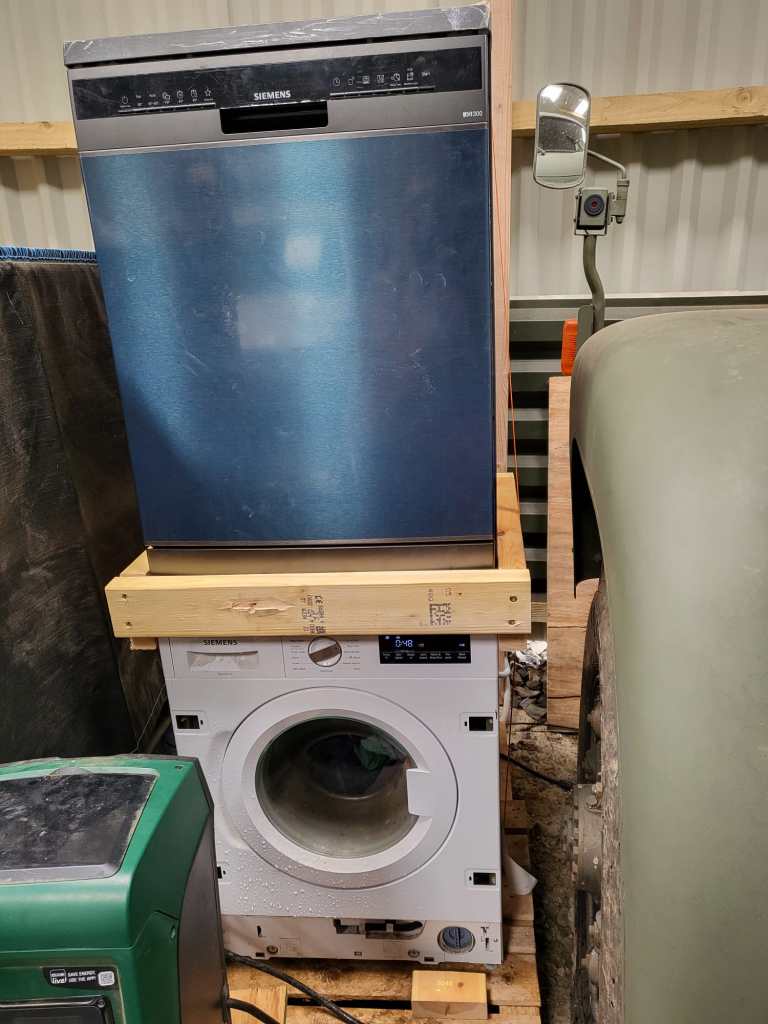
As we wrote previously, we installed a dishwasher – and sat it on top of our washing machine. Currently, the only place where we had space _and_ water in reach …

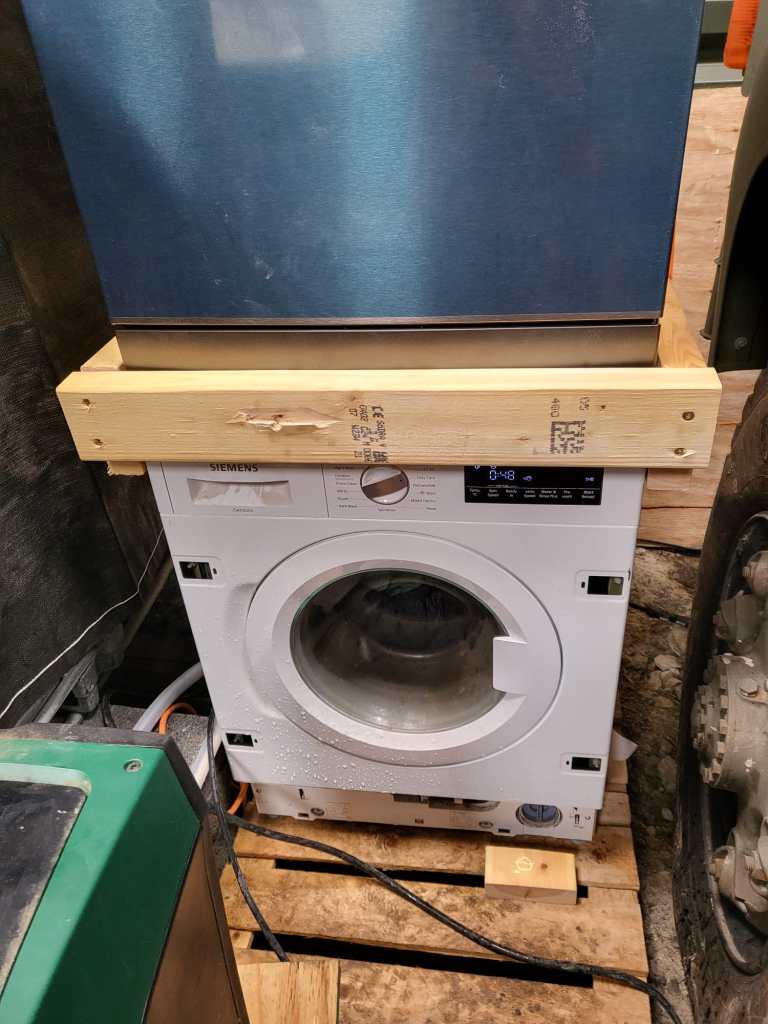
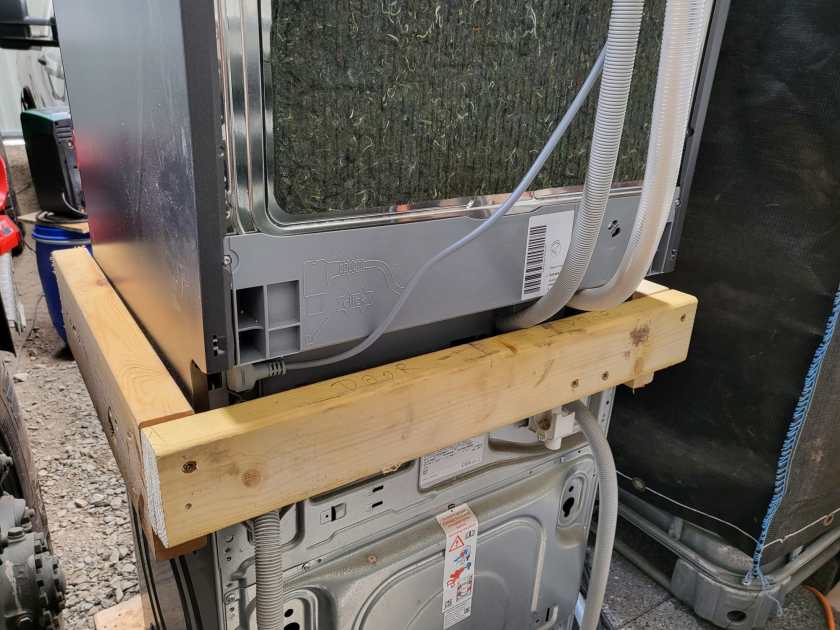
But operating the washing machine not astonishingly proved very unstable – at least for the dishwasher. So, we decided to create a luxurious frame to sit the dishwasher and hold in place when the washing machine was spinning.

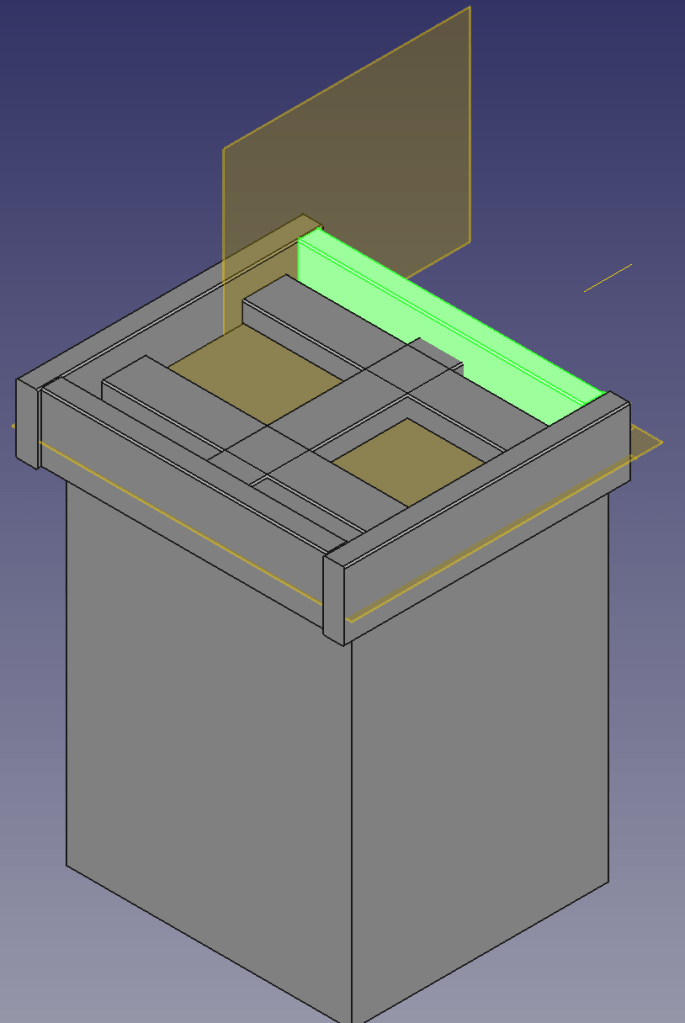
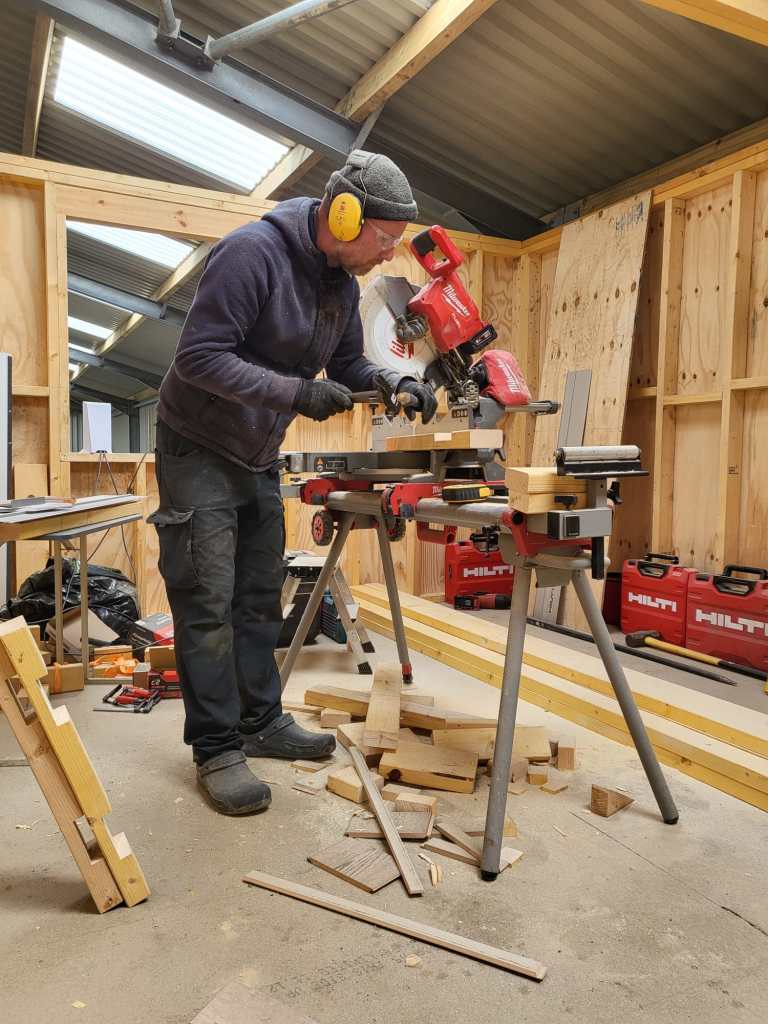
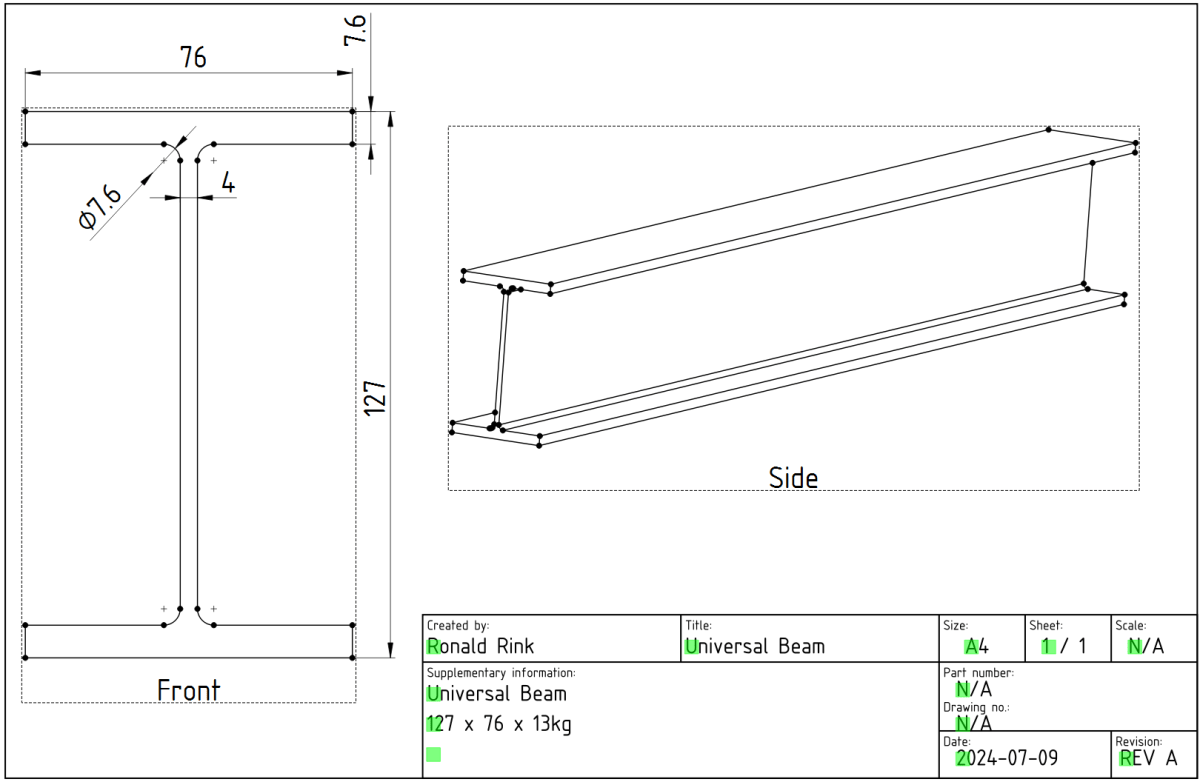
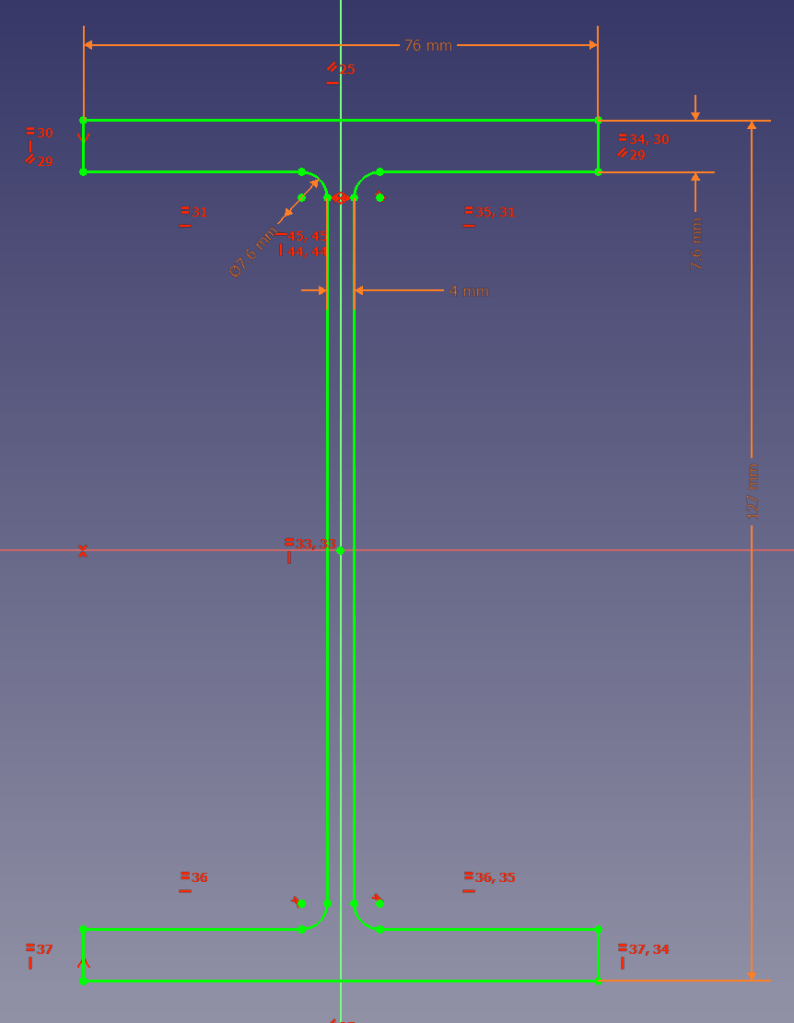
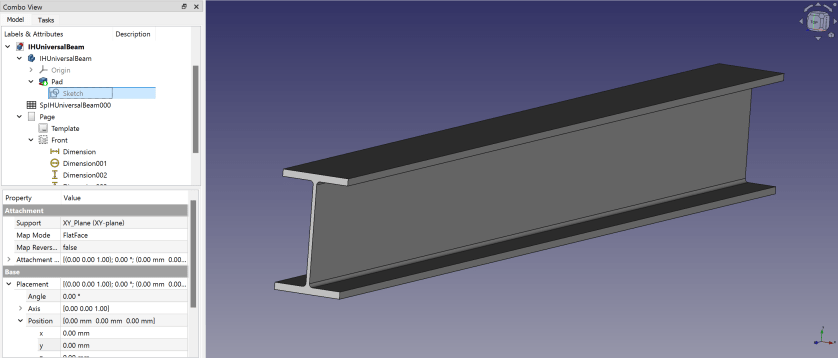
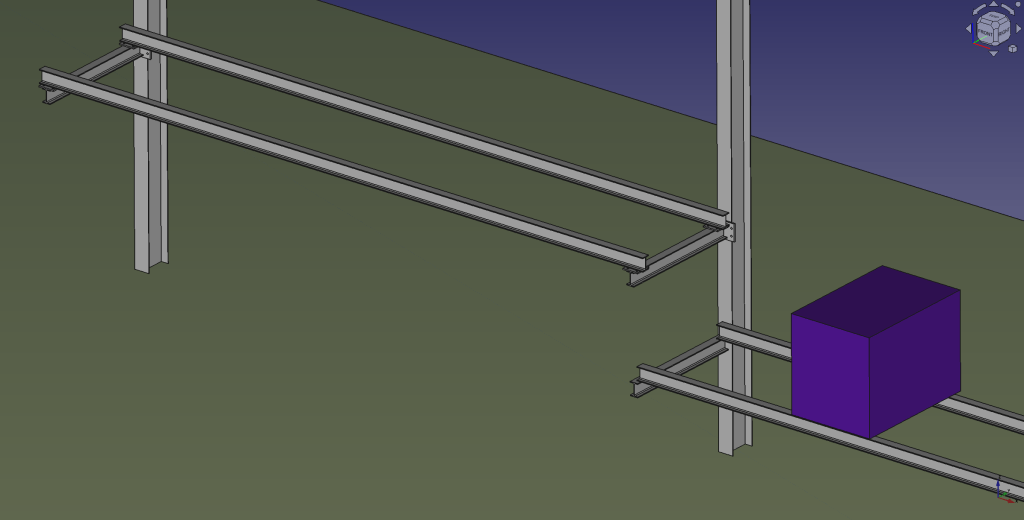
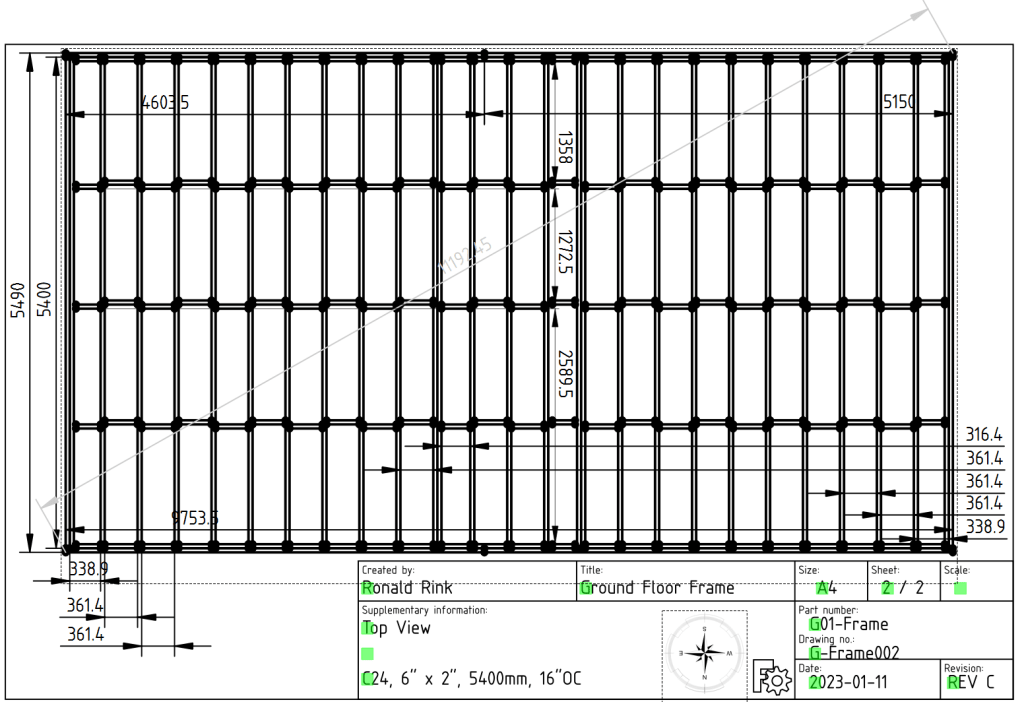
Not being agile but very waterfall, I needed a concept first. So, I fired up my trusted CAD programme and started sketching …

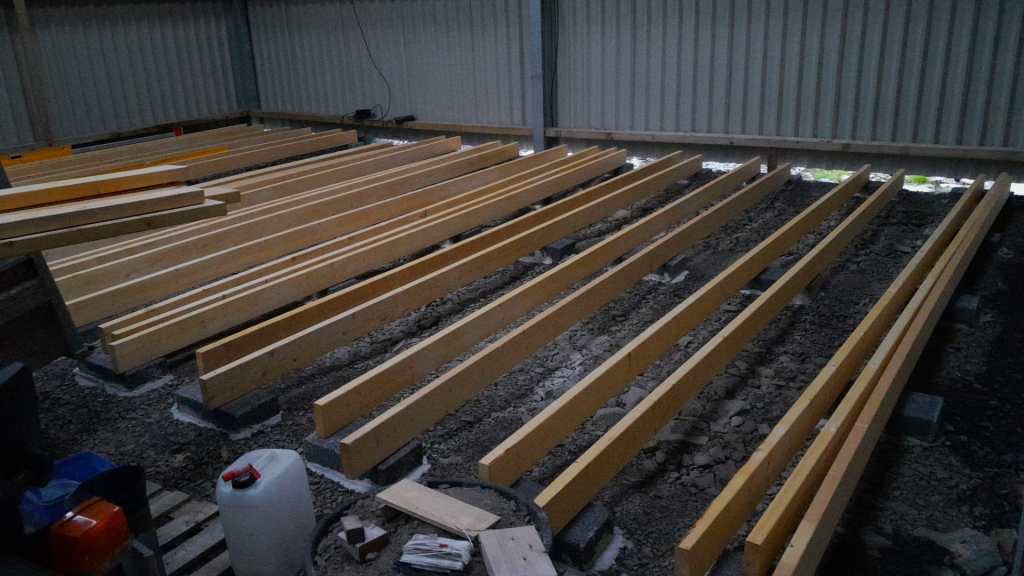
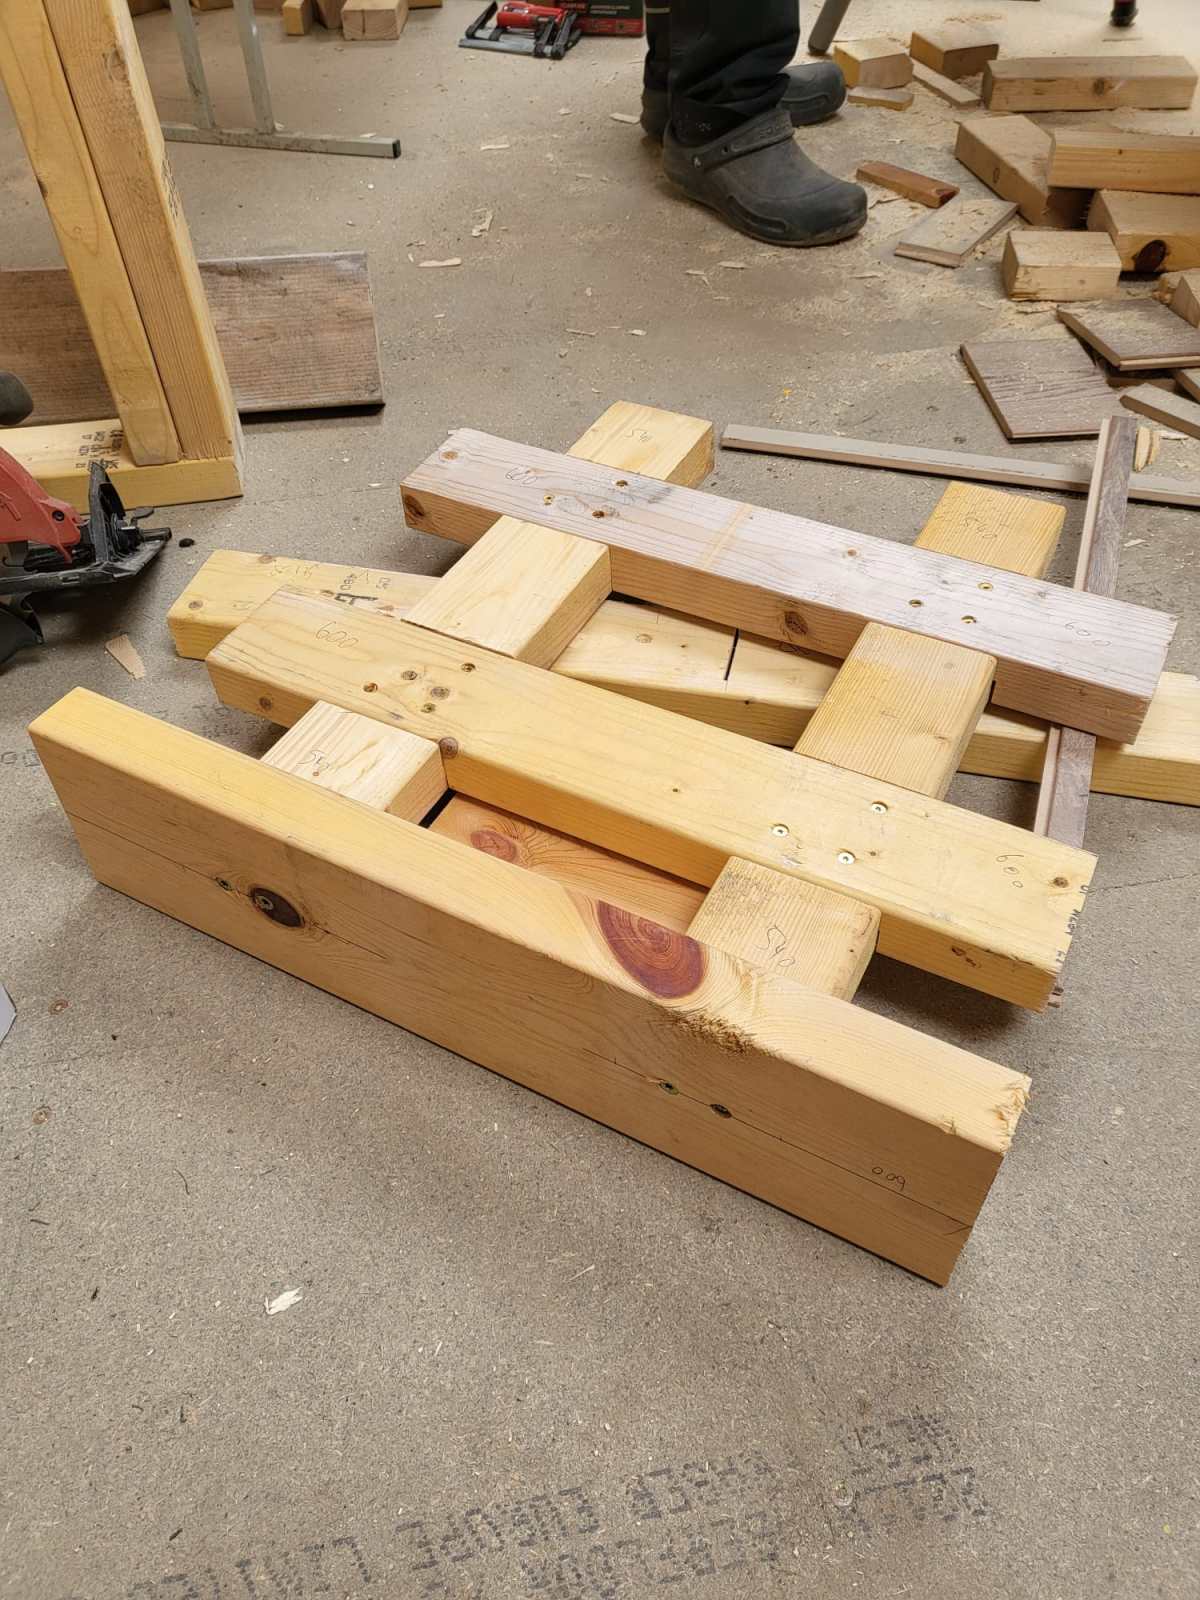
4x2s intersected with other 4x2s surrounded by 6x2s – that was the way to go.

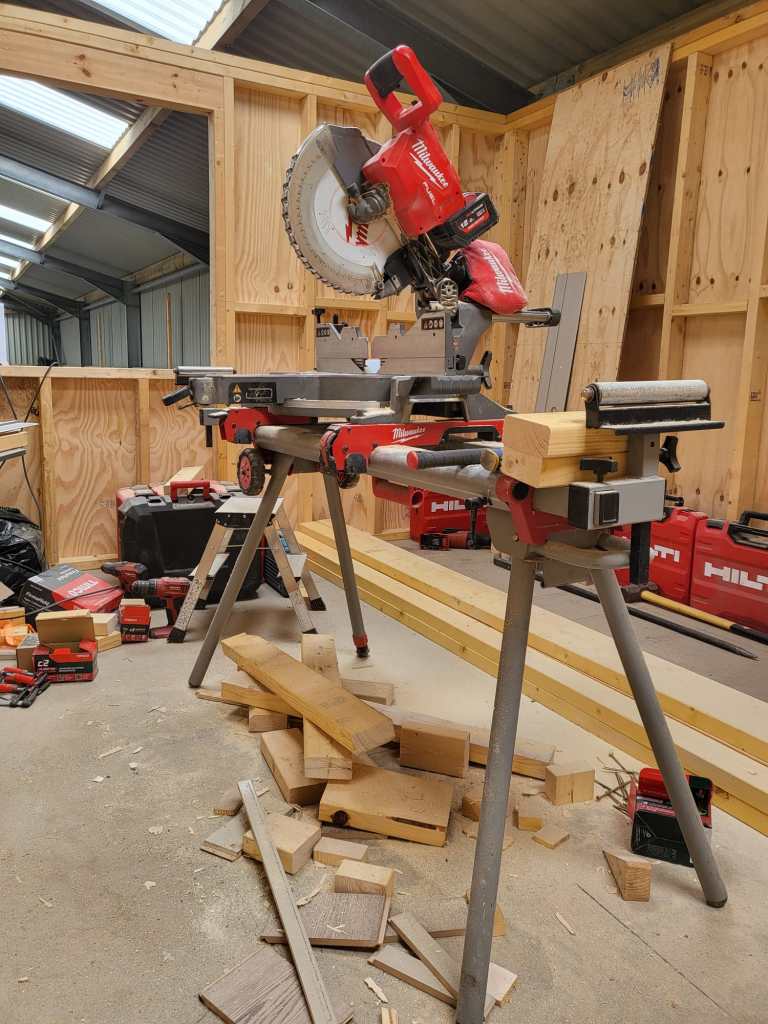
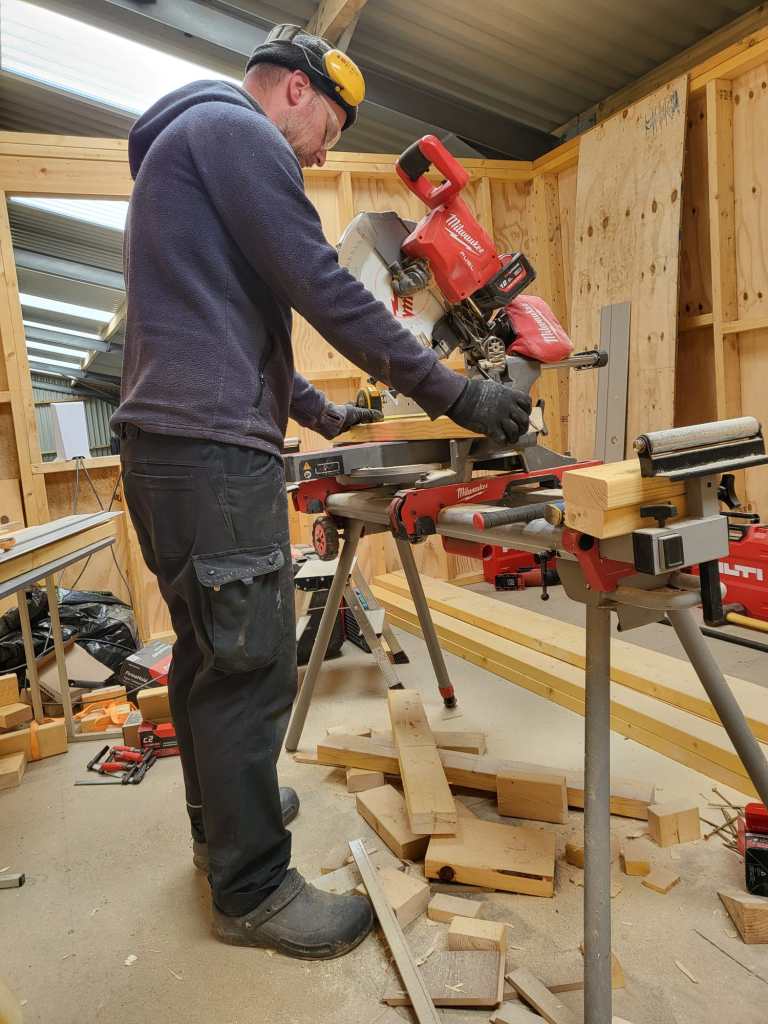
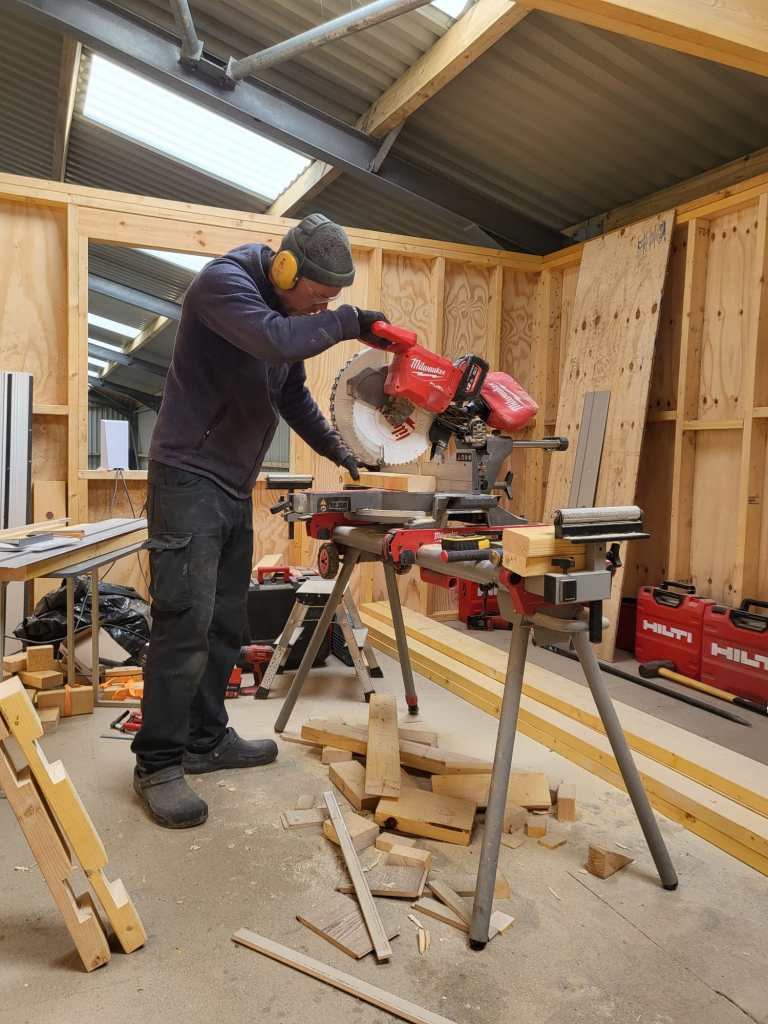
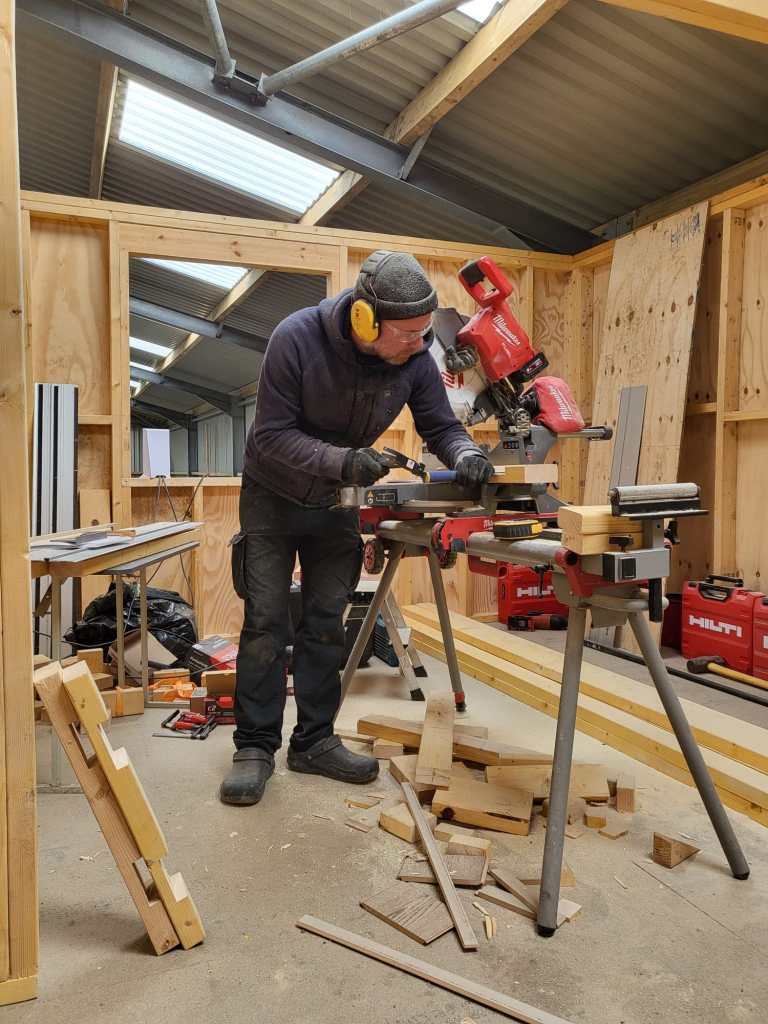
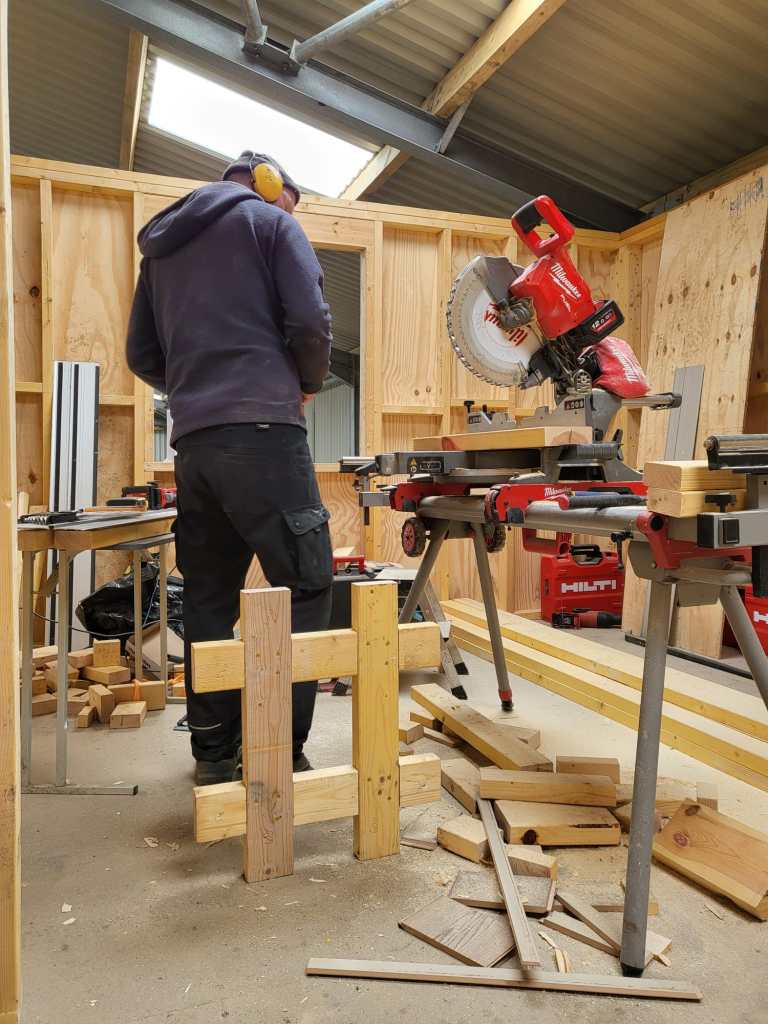
So, first I cut the intersections of the 4x2s and used chop saw and chisel to get the cross sections.

Later on, we added 6x2s so the dishwasher would not fall off. And at the end, not visible on the images, we added a strap around both devices to stop the dishwasher from bouncing off – just in case …

Now we have a washing tower – until we move it into our new kitchen. And this is all I can tell. See for yourself.

Cutting the Frame for the Washing Tower
Washing machine in action with finished Frame and Dishwasher on top

Creating a parametric Universal Beam in FreeCAD 0.21.2

While designing our future heavy-duty pallet shelf, I had to try with different Universal Beams (UB, BS EN 10025-2). And though, there are plenty of templates to reuse I _had_ to create a universal beam myself.

The main reason was and is, I wanted to be able to quickly change the dimensions of the UB in a single place and reuse it with other parts and bodies I created.

However, it took me three attempts to create a stable model, that would survive any resizing… and here is what I learnt:

I started the sketch with three rectangles, which I – after attaching and trimming them – constrained with the overall beam parameters. The arc/radius was the tricky part. I either ended up overconstrained or un-stable where edges would flip. So, I removed (nearly) all constraints like symmetric, parallel, horizontal, equal (except for the overall dimensions), added the arcs, coincided the points with the neighbouring edges and manually coincided the points of the remaing edges. Only then I re-created the required symmetric, parallel, horizontal and equal constraints.

Sketch with parametric constraints taken from spreadsheet

Here is a 3D view of the resulting beam:

Isometric view of the Universal Beam

I then added another 30+ UB dimensions to the spreadsheet so I could use them in the beams constraints via expressions. If I now copy any of the existing value of lines 5 following to line 3 into the yellow cells the beam is automatically resized.

So, this is the beam and how to use it. In case you are interested, you can download it at grabcad.com:

Download model at https://grabcad.com/library/ub-universalbeam-1

And here is a sneak preview of how the final shelf could look like:

Draft of shelf mounted to Universal Column in our barn

I again, still and always find it ranging from very difficult to frustrating to work with FreeCAD to create stable models – especially when they are parametric. But hey, this is FreeCAD as in free software.

The Platform is finally done

Last year in December, I started the drawings (with FreeCAD) for our “house-in-house” build: a wooden compartment inside our barn for electricity, water, storage and the like. But somehow, I never started it because of my mental concrete block (pun intended). This changed when a colleague of ours came by and helped me with laying the concrete pads. And from there we did the frame and the floor in less than 2 days – thanks to our Milwaukee Nailer and Larry Haun with his book The very efficient Carpenter.

Of course, there were some gotchas and mistakes needed to be fixed. But all in all it went really well. So well, that in fact we could have our first BBQ on the new platform (and not in the dust as usual).

So, below you find some pictures and drawings of the “house-in-house” and the making of the platform of the ground floor.

Overview of ground floor

Ground floor frame resting on pads
Frame of ground floor
Getting the pads in place
Starting with the frame
Nails – the more, the better
Now only the blocks are missing
Inspection of our work so far
The frame is done
Ground floor with the first tow of OSB sheets
Getting somewhere
Finally, a table not in the dust