Using an Autoterm 2D heater with a Baseus 100W USB-C PD power bank

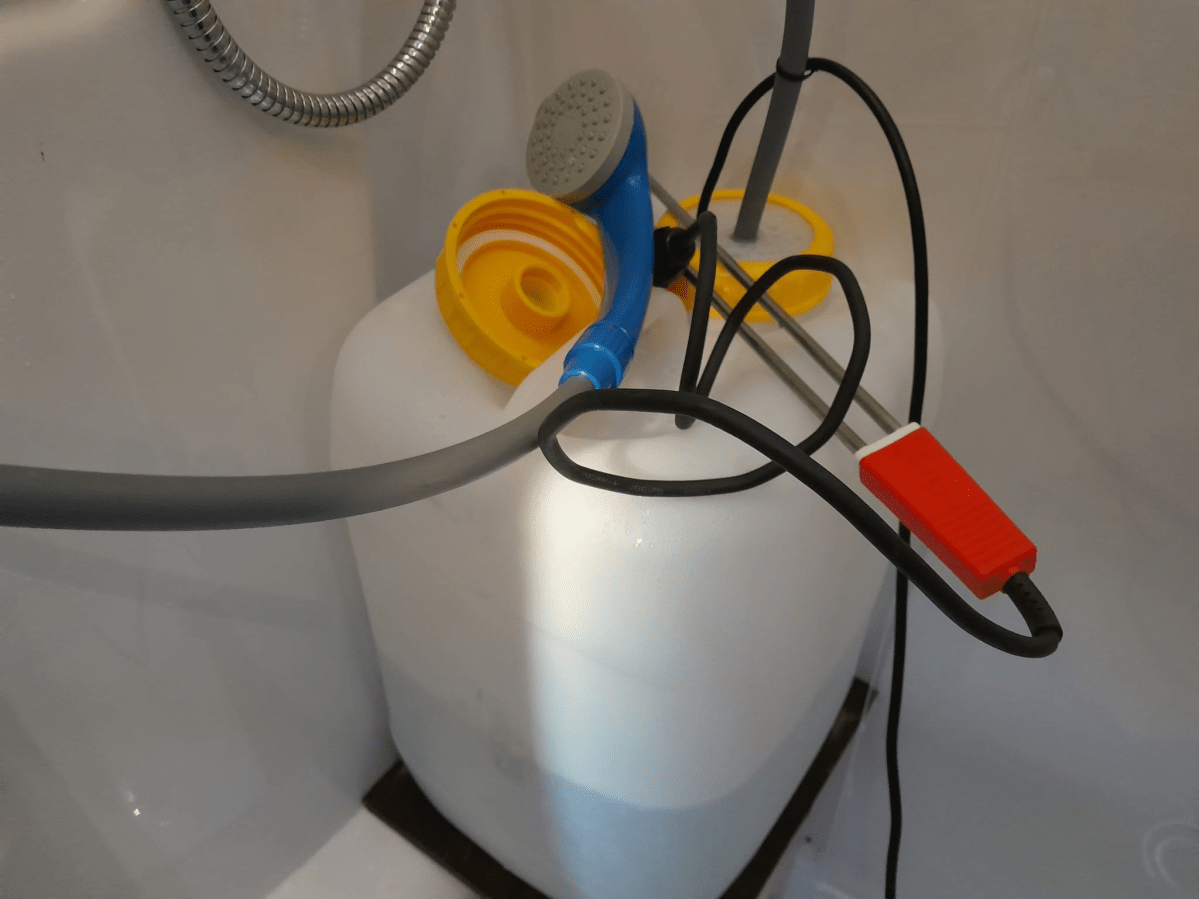
Some years ago, we bought a Autoterm 2D diesel heater with a waterproof box. This heater actually needs an external 12V power supply (or a 24V power supply, depending on the model you buy). Until now, we always connected this to one of our 12V leisure batteries. That meant we always had to carry a long 12V extension cable with us. Not any more …

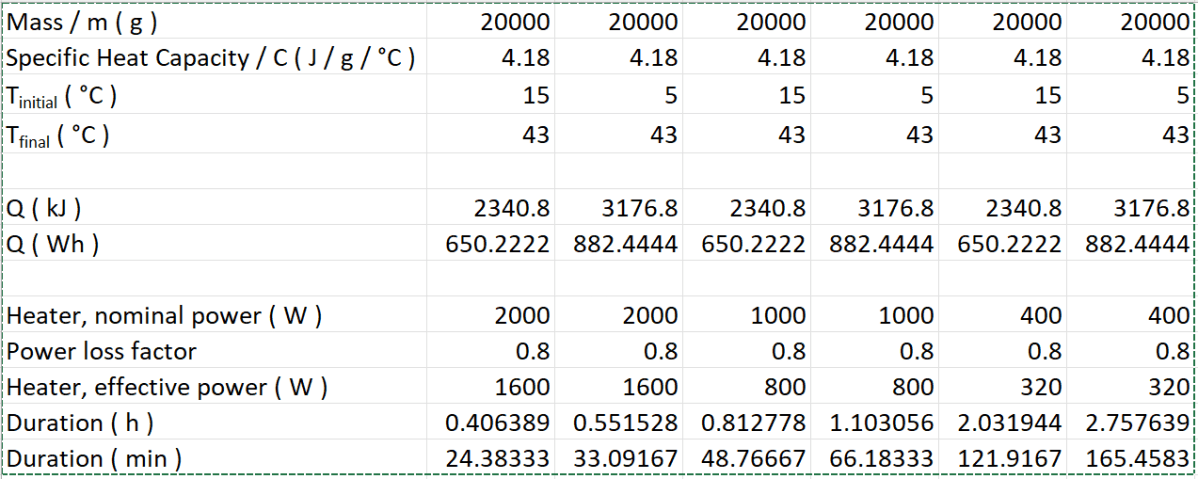
Since we had such a good experience with our mobile shower via USB-C that originally also runs on 12V, I went looking for more devices with a 3A @ 12V power requirement. And according to the data sheet Autoterm 2D just is such a device. The manual states a power requirement from 10W (min 800W heating power and 34m3/h) to 29W (max, at 1800W and 75m3/h).

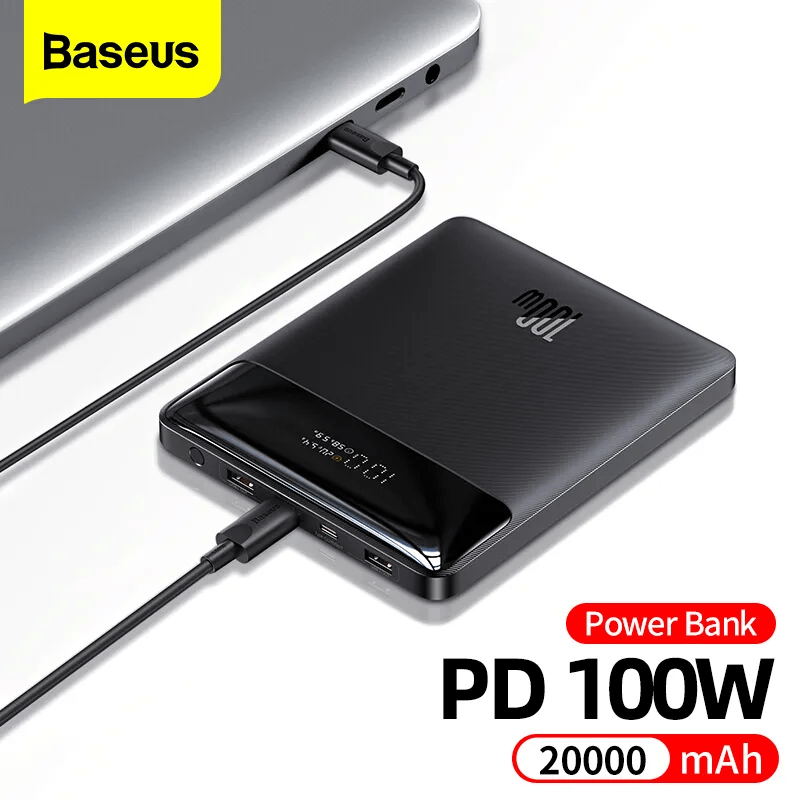
So, I got myself a Baseus 100W Power Bank 20Ah from Aliexpress that can deliver the required power. With this unit the diesel pump can be powered for approx 2.5h at full capacity and approx 7.5h at minimum capacity.

Actually, any power bank with USB-C PD that delivers 3A @ 12V could be used. And if you take a power bank with a higher capacity the heater will certainly run longer.

Baseus 100W Power Bank 20000mAh Type C PD, taken from https://www.aliexpress.com

Connecting the heater to the power bank is done in the same way we connected the mobile shower. Again, with the help of Aliexpress: USB C PD Type C Male to 12V Car Cigarette Lighter Socket

USB C PD Type C Male to 12V Car Cigarette Lighter Socket, taken from Aliexpress

In my opinion, the advantages of this approach are:

  1. Flexibility: we can carry the power bank along with the heater and do not need to keep a 12V power source (leisure battery or else) nearby. An option to power a power bank is probably easier to find than a 12V source. Especially true for our trailer with a 24V battery.
  2. Price; power bank is around 51CHF and the converter 5CHF (and the battery 1700CHF) . Compared to the other heater we have, the Profidurium Mobile-Heater 2kW, this is much cheaper. The additional battery with charger costs an additional hefty 970CHF (on top of the 2300CHF for their heater).
  3. Weight: 400g for a power bank is a neglectable additional weight compared to a full blown battery.

Quick review of our 12V USB-C mobile shower

Last December we wrote about our plans for a mobile shower. And today, I describe show how it actually works.

We currently use the shower, Brunner Aquafresh 2.0, in our Caravan instead of the built-in shower with the boiler to reduce the risk of legionellae and to conserve power.

We heat the water with a 2000W immersion heater which takes around 25min to heat the water to 43°C from 15°C (see the post linked above for more details on time and power requirements). And make sure to stir the water after heating before use.

The water is kept in a DIN96 20l wide-neck container from Comet with a special dust 2-hole cap to fit the hose and the elecitricity cable into it. The pump itself has a standard 12V car/cigarette plug that connects to a USB-C trigger board that takes it power from a USB-C power bank with Power Distribution (PD) 2.0.

Everything is kept within a 30mm PIR tube and glued together with hot glue. This does not look to nice but it works. To further “water proof” the device I keep it in a plastic zip-lock bag with the opeining upside down. See below for an even easier option for this.

The on/off-switch on the shower itself is not waterproof – but until never got too much water to produce a short.

To actually get the hose and the electricity cable through the plastic cap of the container I cut away the switch (as it could not be opened) and connected a new one (from Steffen, bought at Landi for 1,50 CHF).

The power bank must be able to deliver 3A @ 12V (the pump has a nominal power consumption of 35W). Water pressure is ok, but not great. Two people can consecutively shower from a 20l container (without washing long hair, of course).

Video: Quick review of our 12V USB-C mobile shower

We also use it in our cars as a mobile shower. On the road we only have a 1000W immersion heater, so heating up the water takes twice as long. But in the summer the initial temperature is much higher so it slightly compensates the total time needed.

UPDATE: instead of going through the hassle to build a USB-C to 12V converter yourself, you can also buy this item from Aliexpress. It is a sealed USB-C to 12V converter. It is much smaller than the tube-based device and costs only around 5CHF, but has no fuse.

Note, that there is a version with and without converter. I went for the version with the converter and with a cable length of 300mm.

USB C PD Type C Male to 12V Car Cigarette Lighter Socket, image from aliexpress.com

Our plans for a mobile hot water shower

While we were building our washroom on the plot, we were thinking of having a hot water shower in there as well. But instead of having a boiler and keeping the water hot for an extended unused time, we were thinking of sth different:

A manual boiler and a 12V camping shower.

The ingredients

How it works

  1. Fill the canister with water (20l max).
  2. Place the thermometer into the canister.
  3. Place the heater into the canister and hook it to the opening of the canister. Make sure the metal of the heater does not touch the plastic or the thermometer.
  4. Power on the heater (either from your battery or your inverter) and wait until the water gets to the destination temperature. For the actual duration see “The maths” section below.
  5. Remove the heater.
  6. Insert the immersion pump of the shower into the canister.
  7. Connect the power bank to the USB-C trigger board via the USB-C cable.
  8. Have the trigger board output voltage to be set to 12V permanently or set it manually to 12V.
  9. Connect the power calbes of the shower to the trigger board.
  10. Have a shower.

The maths

In case you are wondering, how it would take to heat up the water, here is my calculation (with the formula taken from various sources on the internet).

Q = m * C * delta(T)

So in case we want to heat 20l to 43°C from an initial temperature of 15°C with a 2000W immersion heater, we might need to wait for approx. 25min. If we did same but with an initial water temperature, it took us roughly 33min.

With a 1000W immersion heater, the numbers would change to 49min and 66min. And with a 400W we would have to wait 122min or 166min.

The amount of power needed is also shown on the above table. As you can see, it uses between 650Wh and 885Wh. So be careful when using a 12V immersion heater with your 90Ah car battery – don’t …

Conclusion

It quickly becomes obvious that a heater with only 400W will take too long to heat the water. At least I would put it over night into the motorhome, caravan, trailer or wahtever place so it can “pre-warm” a little bit. This might save you between 45min – 60min.

With 20l of water the shower experience will be limited to under 6min on “full throttle”. But with careful “breaks”, I still think the amount of water is sufficient for a full shower (not including washing long hair, of course). And if this does not provide sufficient water, there is always the option to add another 20l.

And: we will post a video with visual evidence as soon as it gets warmer …

Heating water with an immersion heater and thermos flask

Today I will task about how we heat water in our Toyota or caravan with a relatively low power consumption.

For this, we use an immersion heater that has a nominal power consumption of 1000W. The water is inside a one liter steel thermos flask. Be careful of course not to fill it up too much to prevent the boiling water of sparkling out of the flask.

Prosper Tauchsieder Real (image from galaxus.ch)

The water here has an initial temperature of 20°C (68F) and takes around 5 to 5 1/2 min to boil.

We successfully used the heater with different inverters. It also worked well on a relatively small model, like the Votronic 1200W and the 12V 200A Liontron battery without any issues.

There are even immersion heater models with lower power consumptions – often with a “portable” denomination. But of course it will then take accordingly longer to boil the water. But it might make sense if you have a smaller battery system or inverter. And there are DC models as well, that can be attached directly to a battery without an inverter at all.

But the main point for us was that this immersion heater just fits perfectly into the flask (after we removed the metal ring you can see on the picture). So after boiling, we can leave the water inside the flask without the need for an additional pot, and without having it to pour from one pot to the flask either.

The heater has a small plastic hook that it holds it in place. So it does not touch the bottom or any side of the flask.

After use the device is certainly hot, but it cools down quite quickly. If you use the water and empty the flask right away and do not have a proper surface on where to cool it, you can stick it back into the flask for cooling off.

And when not in use, the water heater takes nearly no space at all, or at least much less space than a normal electric water heater.

Two years ago, this water heater cost us roughly around 25 CHF. This is (today) around 25 EUR or 22 GBP. We got it from Galaxus, a swiss online shop. But we have no affiliation with it at all.

This model is called “Prosper Tauchsieder Real“, whatever this means. But as I said, there are plenty of different models out there.

Don’t forget to unplug the heater after use as it doesn’t have a sensor to detect when the water is boiling. The description however says, it has a dry detection feature. But I really never tried that out.

So this is it for today.