

Now, that we just finished our plumbing course, it is time to apply our freshly acquired skills.

What better opportunity could there be than to convert an old workshop into a modern flat? During the next weeks we will document our plans and progress towards that conversion.
These are the things that need to be done:
- Add an interiour wall to separate bath room from kitchen
- Add an interiour wall to separate bed room form entrée
- Paint walls and ceiling
- Lay laminate flooring
- Rewire electricity, add energy meter and distribution board
- -and of course now to the plumbing- Install pipe work for water in bath room and kitchen
- Move soil stack up to first floor
- Install shower, toilet, basin and washing machine
- Install kitchen sink and dish washer
- decommission existing connections
- … and clean up and make space first
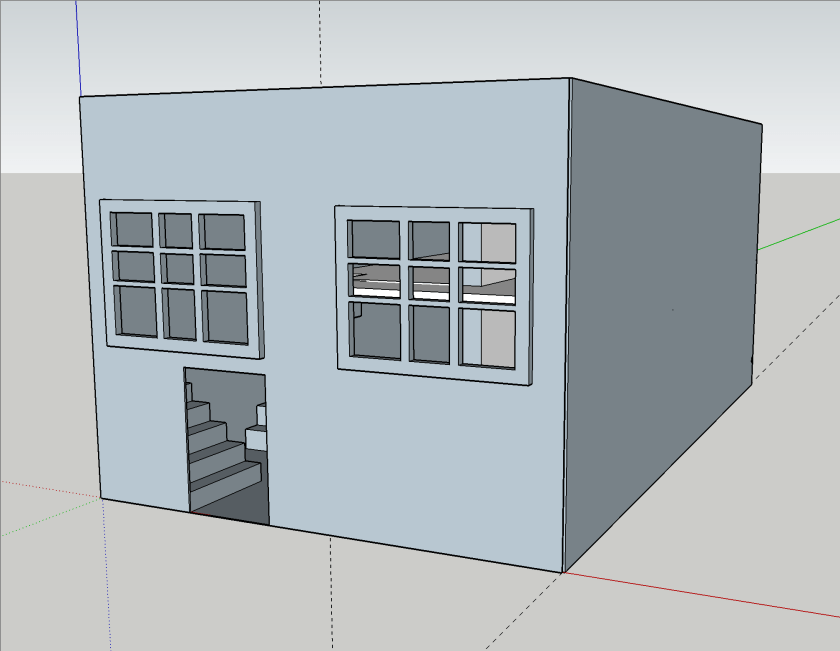
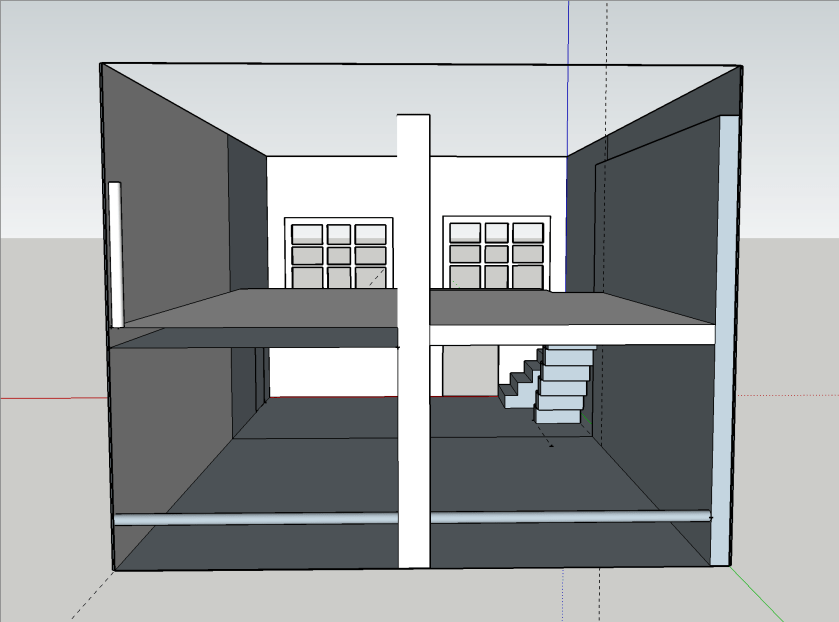
We first started with a basic room layout which I did in Sketchup Make 2017, the last *free* version of Sketchup by Google (now owned by Trimble). Though Trimble does not support or offer that version, thanks to the Internet Archive Wayback Machine the version can still be downloaded.
Note: the “PRO Trial” will revert to the free version aftert 30 days.
My last Sketchup experience dates back to 2015 when I modelled the packaging for the beer bottles of our then breweey, so the model I came up with now (not completed) is not really stable not particularily beautiful. But you will get an idea.

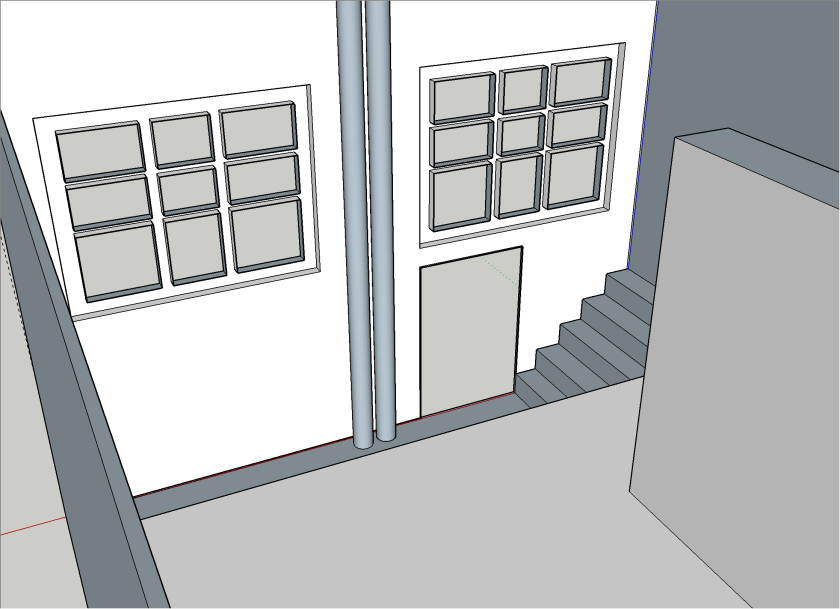

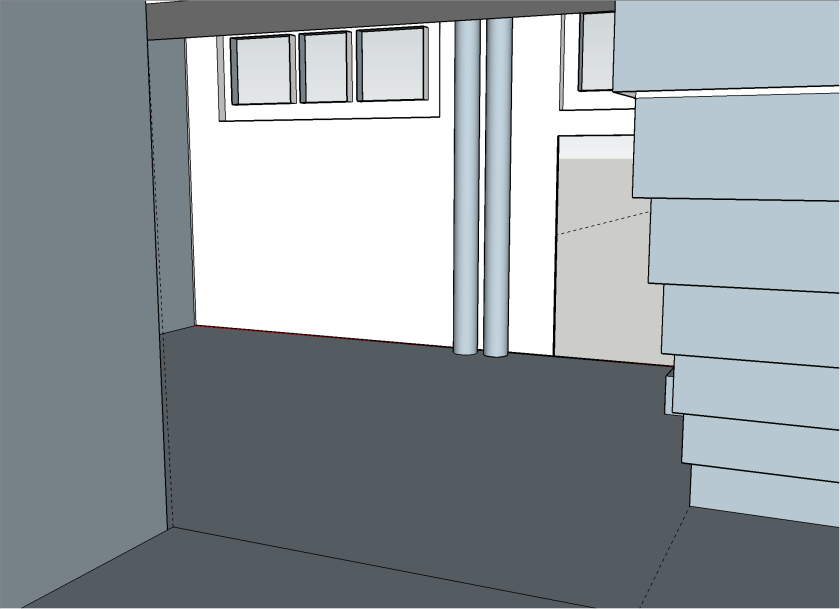

As the walls of the building are made of ferroconcrete and we are not fans of flush mounting we decided to put all the pipework and cabling on the walls and not hide them in conduits.
For the pipework we decided to use Geberit Mapress 15mm stainless steel pipes. There we go for the slightly cheaper 1.4521 variant (and not 1.4401) which is also approved for drinking water:

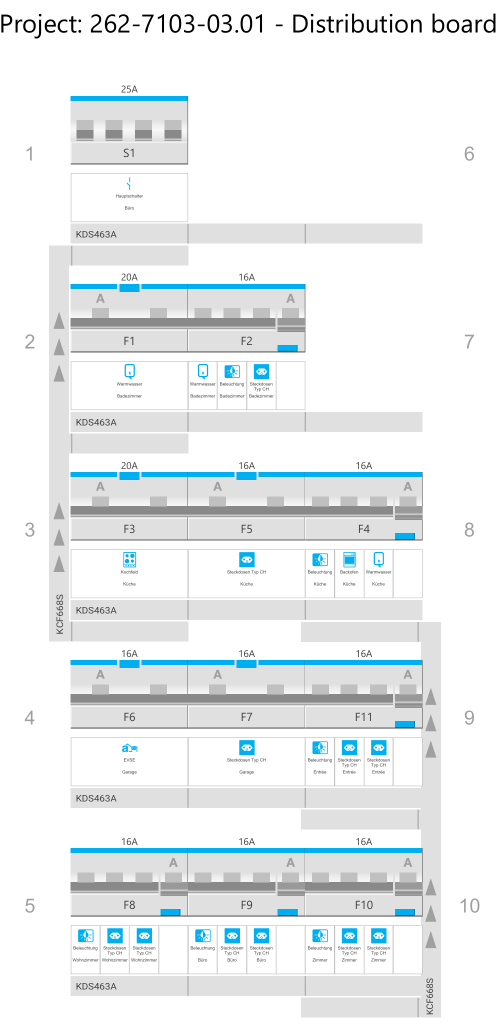
For the electrical installation we have to install a distribution board with a separate energy meter. For this, we chose Hager and wanted to try out the quickconnect system, where everything is just plugged into place instead of being screwed down.
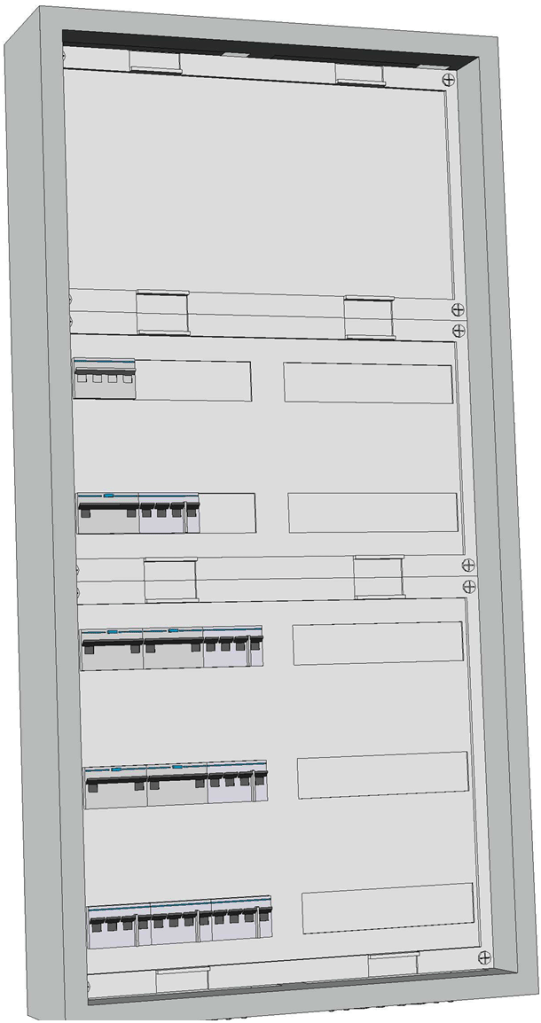
With the Hager Ready app (on Windows) it was suprisingly easy to configure and validate the layout (though the “wizard” was not working in my favour and always picked the “wrong” products which is why I added the components manually):
It even generated a 3D view of the selected enclosure:
For the connection of the actual wires from the rooms to the 11 RCBOs I chose to go via 2003 WAGO DIN rail terminal blocks (on row 1 of the board). So with quickconnect in place and these terminal blocks, I only have to run 56 2.5mm2 wires (plus one 16mm2 PE) for the whole distribution board!
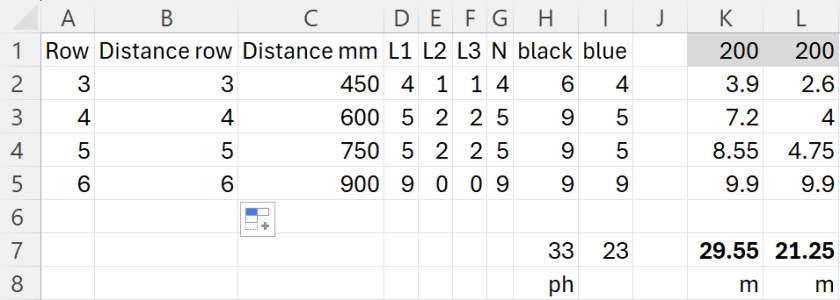
To make calculation of the required cable lengths a little bit easier I threw the numbers into this spread sheet:
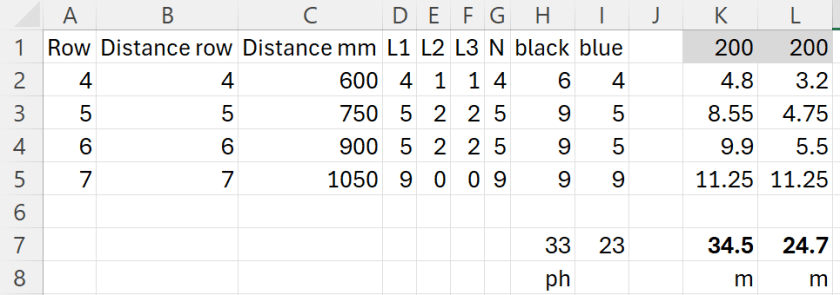
For 33 phases and 23 neutrals RCBOs I would need nearly 60m of wire! This is because I really cannot use bus bars for neutral. For a comparison: If I had got a 2×6 distribution board I would have used nearly 10m less for the internal cabling (but unfortunately, there was none available):
I ordered most of the electrical stuff today and will have an update on it when the material arrives.
And this is it for today.

2 thoughts on “Converting a workshop into a flat”